Video Center > QuickBooks Online Tutorials > QuickBooks Online
Video: How to Reconcile a Bank Statement in QuickBooks Online
Video: How to Reconcile a Bank Statement in QuickBooks Online
A fundamental step in keeping your finances organized and up-to-date is is to reconcile your bank statements in QuickBooks Online.
Reconciling a bank account in QuickBooks Online enables users to verify their transactions are recorded accurately, on the correct date, and during the right time period. Reconciling also helps you identify any fraudulent charges and mitigate any statement errors.
What is reconciliation?
Reconciliation is simply the process of matching the transactions on your bank statements with the transactions recorded in Quickbooks Online.
Before reconciling your bank accounts in QuickBooks Online, make sure all transactions have been recorded in your accounting software and you have your physical bank or credit card statements handy to compare them to your statements in Quickbooks.
Follow these 4 steps to reconcile your bank accounts in QuickBooks Online
Once you login to QuickBooks, you’ll be routed to your main dashboard (shown below). From your main dashboard, you can begin the reconciliation process in QuickBooks Online.

Step 1:
To begin the reconciling process in QuickBooks Online, find the Accounting option on the left (gray) sidebar in your main dashboard. From the dropdown menu, select the Reconcile tab.

Step 2:
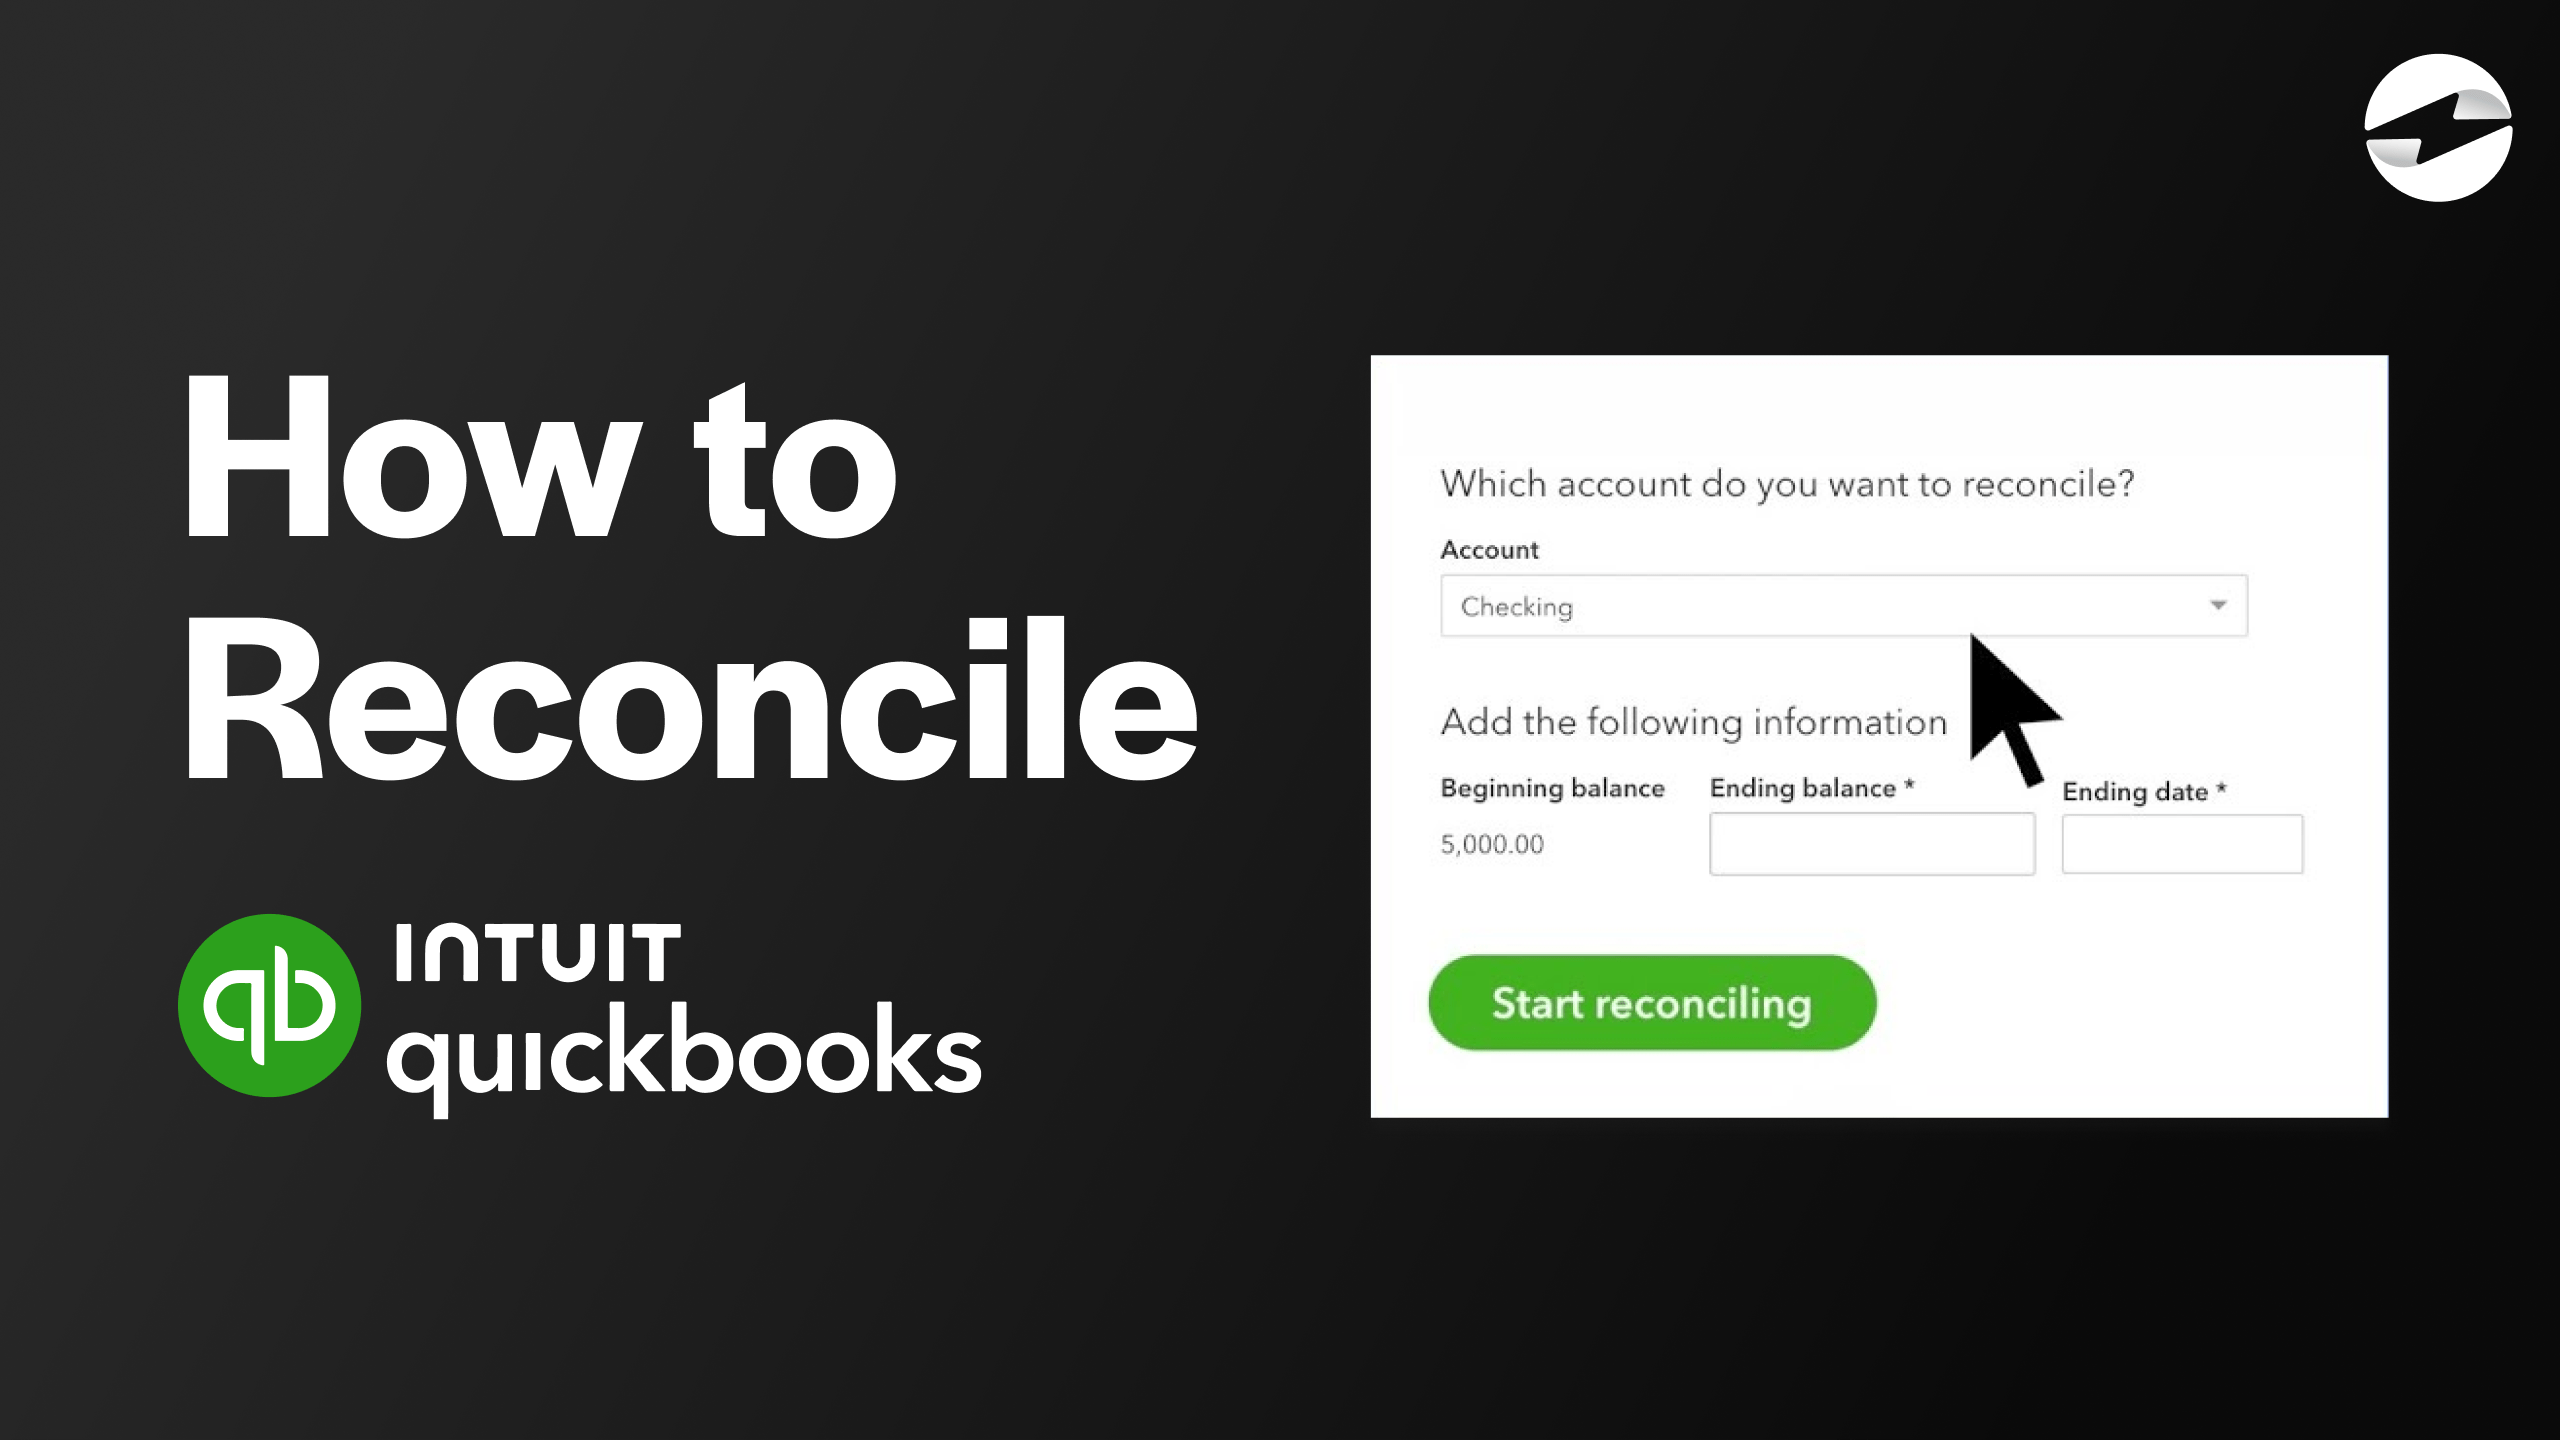
After clicking Reconcile, a new page will load with an Account dropdown menu for you to choose which account you’d like to reconcile.

Once you’ve selected the account you wish to reconcile, the Beginning balance should appear. You can then reference your physical bank statements to input the Ending balance and Ending date into the prompts provided.

You can also click on the Bank Register button to open a new page which will display the Ending balance in the top right corner. If you use this option, make sure to cross-reference this information with your bank statements.
After you’ve entered all this information, click Start Reconciling.
Step 3:
The QuickBooks Online Reconcile page will display all your transactions during the time range you selected.

This is where you’ll match your transactions listed on your physical bank or credit card statements with the information listed in QuickBooks Online.
Some of the transaction details listed in QuickBooks Online include the payment date, transaction type, account name, payee, payment amount, and more.
Once you’ve matched the transaction information from QuickBooks Online with your physical statements, you can select each transaction by clicking on the circle selection tool on the right side of the page. A checkmark will be auto-filled into each circle to confirm your transaction selection. Be sure to go through each transaction listed to ensure it’s accurate.
Once you’ve finished checking all of the transactions in QuickBooks Online, there should be a zero dollar difference displayed in the top right corner if all the information is correct.

If there is not a zero-dollar difference, make sure all the information is entered correctly and there are no duplicate entries. You can also click on Edit info tab above the dollar difference to ensure your Ending balance is correctly matched with your bank statements balance.
Step 4:
After you’ve confirmed all your transactions match and there is a $0.00 difference, click the green Finish now button in the top right corner to reconcile your bank account in QuickBooks Online.

A pop-up notification will appear to notify you that your bank account has been reconciled.
For a full report of this reconciliation, you can click the View reconciliation report link to view a more detailed breakdown of the completed reconciliation. You can also view a full list of the reconciliations you’ve completed in Quickbooks Online by clicking the History by account link in the top left corner of this page.
If everything is reconciled correctly in QuickBooks Online, the beginning balance of next month’s statement (on the Reconcile page from Step 2) should match the ending balance of the previous month.
Conclusion
Before you reconcile, make sure to record all of your transactions for the month in QuickBooks and have your bank statements with you to compare.
First, you’ll want to click on the settings symbol and go to the reconcile page.
Now, generally, you’d want to have the previous month’s bank statement and reconcile all of the transactions from the beginning to the end of the month, but for this example, using the QuickBooks demo, we will reconcile the entire history of the bank and QuickBooks account.
So, you’ll start by looking at the beginning balance listed on the QuickBooks’ Reconcile page.
Then, go to the bank register. This is just a page that shows the history of your Checking account with all the deposits and payments.
Once you sort by date, you can see that there was an initial $5,000 deposit into the checking account, and that explains why the beginning balance shows that value on the reconcile page.
At the top right of the screen, you’ll see the ending balance. We’ll need to enter this value along with the current date on the reconciled homepage. We can now start the reconciliation process.
In a real-world situation, you want to compare all the transactions on your actual bank statement to what QuickBooks states and highlight each matching transaction.
Once you’ve checked all the transactions, the statement ending balance should match the cleared balance exactly. If there’s a difference, it might mean a mistake was made, so go back and review. A common issue is a duplicate deposit—if that’s the case, just delete the extra deposit in QuickBooks.
For the next statement, If everything adds up, the ending balance should be the beginning balance of next month.
QuickBooks Online Integrations: Enhance Your Workflow
Did you find this tutorial helpful? Streamline your QuickBooks Online experience even further with a QuickBooks Online payment processing integration. Explore how integrating QuickBooks Online with tools like EBizCharge can enhance your workflow, automate processes, and boost productivity. Unlock the full potential of your QuickBooks environment today!