Video Center > QuickBooks Online Tutorials > QuickBooks Online
How to Print a Check in QuickBooks Online: Quick Steps!
How to Print a Check in QuickBooks Online: Quick Steps!
Printing checks directly from QuickBooks Online is a crucial skill for businesses looking to streamline their payment processes and maintain accurate financial records. In this tutorial, we’ll explore why printing checks is important for QuickBooks Online users and provide step-by-step guidance on efficiently printing checks within the platform.
Benefits of printing checks using QuickBooks Online
Printing a check directly within QuickBooks offers several benefits to businesses of all sizes. Streamlining the check printing process allows for greater efficiency and accuracy in managing financial transactions.
One key advantage is the automatic completion of payee details and amounts. QuickBooks automatically pulls the necessary information from the system, eliminating the need for manual data entry. This saves time and reduces the risk of errors that can occur during manual input.
Batch printing is another feature that makes check printing within QuickBooks advantageous. Instead of printing checks individually, businesses can select multiple checks to print at once. This saves time and effort, particularly for companies that regularly process a large volume of checks.
Furthermore, QuickBooks allows businesses to save checks for later use. Instead of printing and distributing physical checks immediately, companies can create and save them as digital files. This feature is particularly useful when checks need to be held until a specific date or when a payment needs to be scheduled in the future.
Printing checks within QuickBooks offers significant benefits, including time savings, improved accuracy, and enhanced financial transaction efficiency.
The first step to writing a check within QuickBooks Online is to log in.
How to write a check in QuickBooks Online?
To create a check in QuickBooks Online, from the main dashboard, go to the top left corner of your screen and select the “new” button.
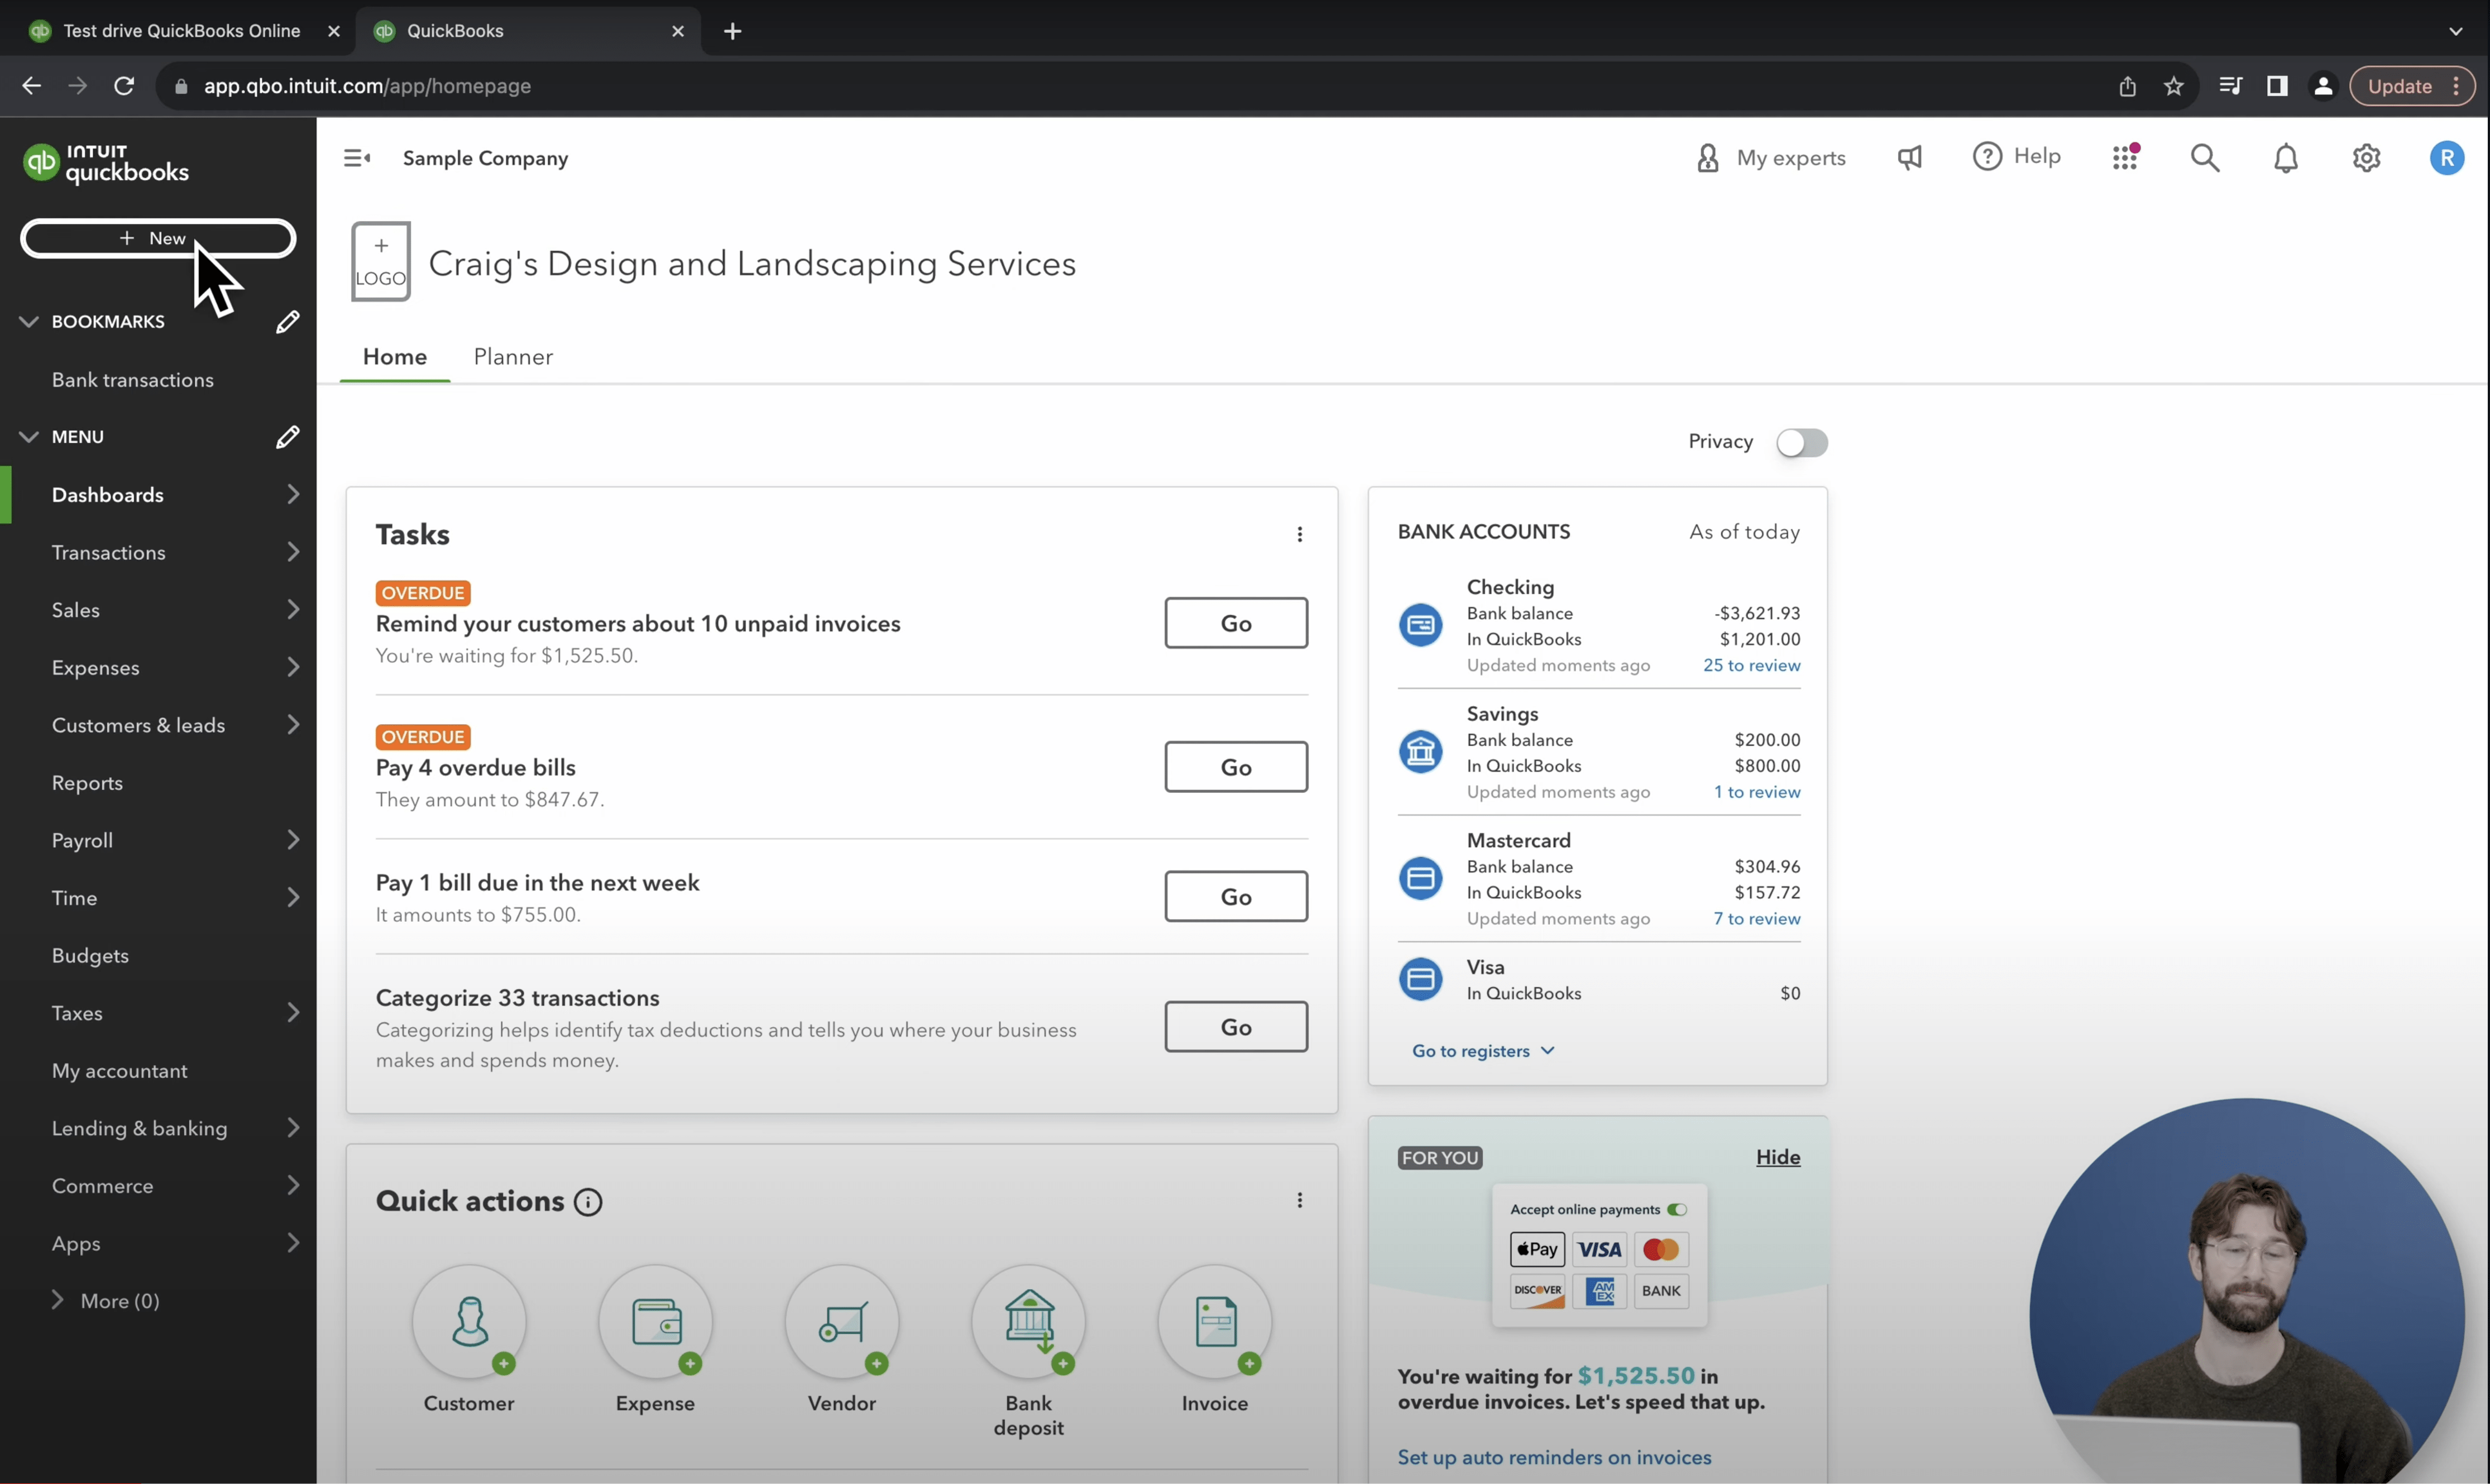
From there, select “check.”
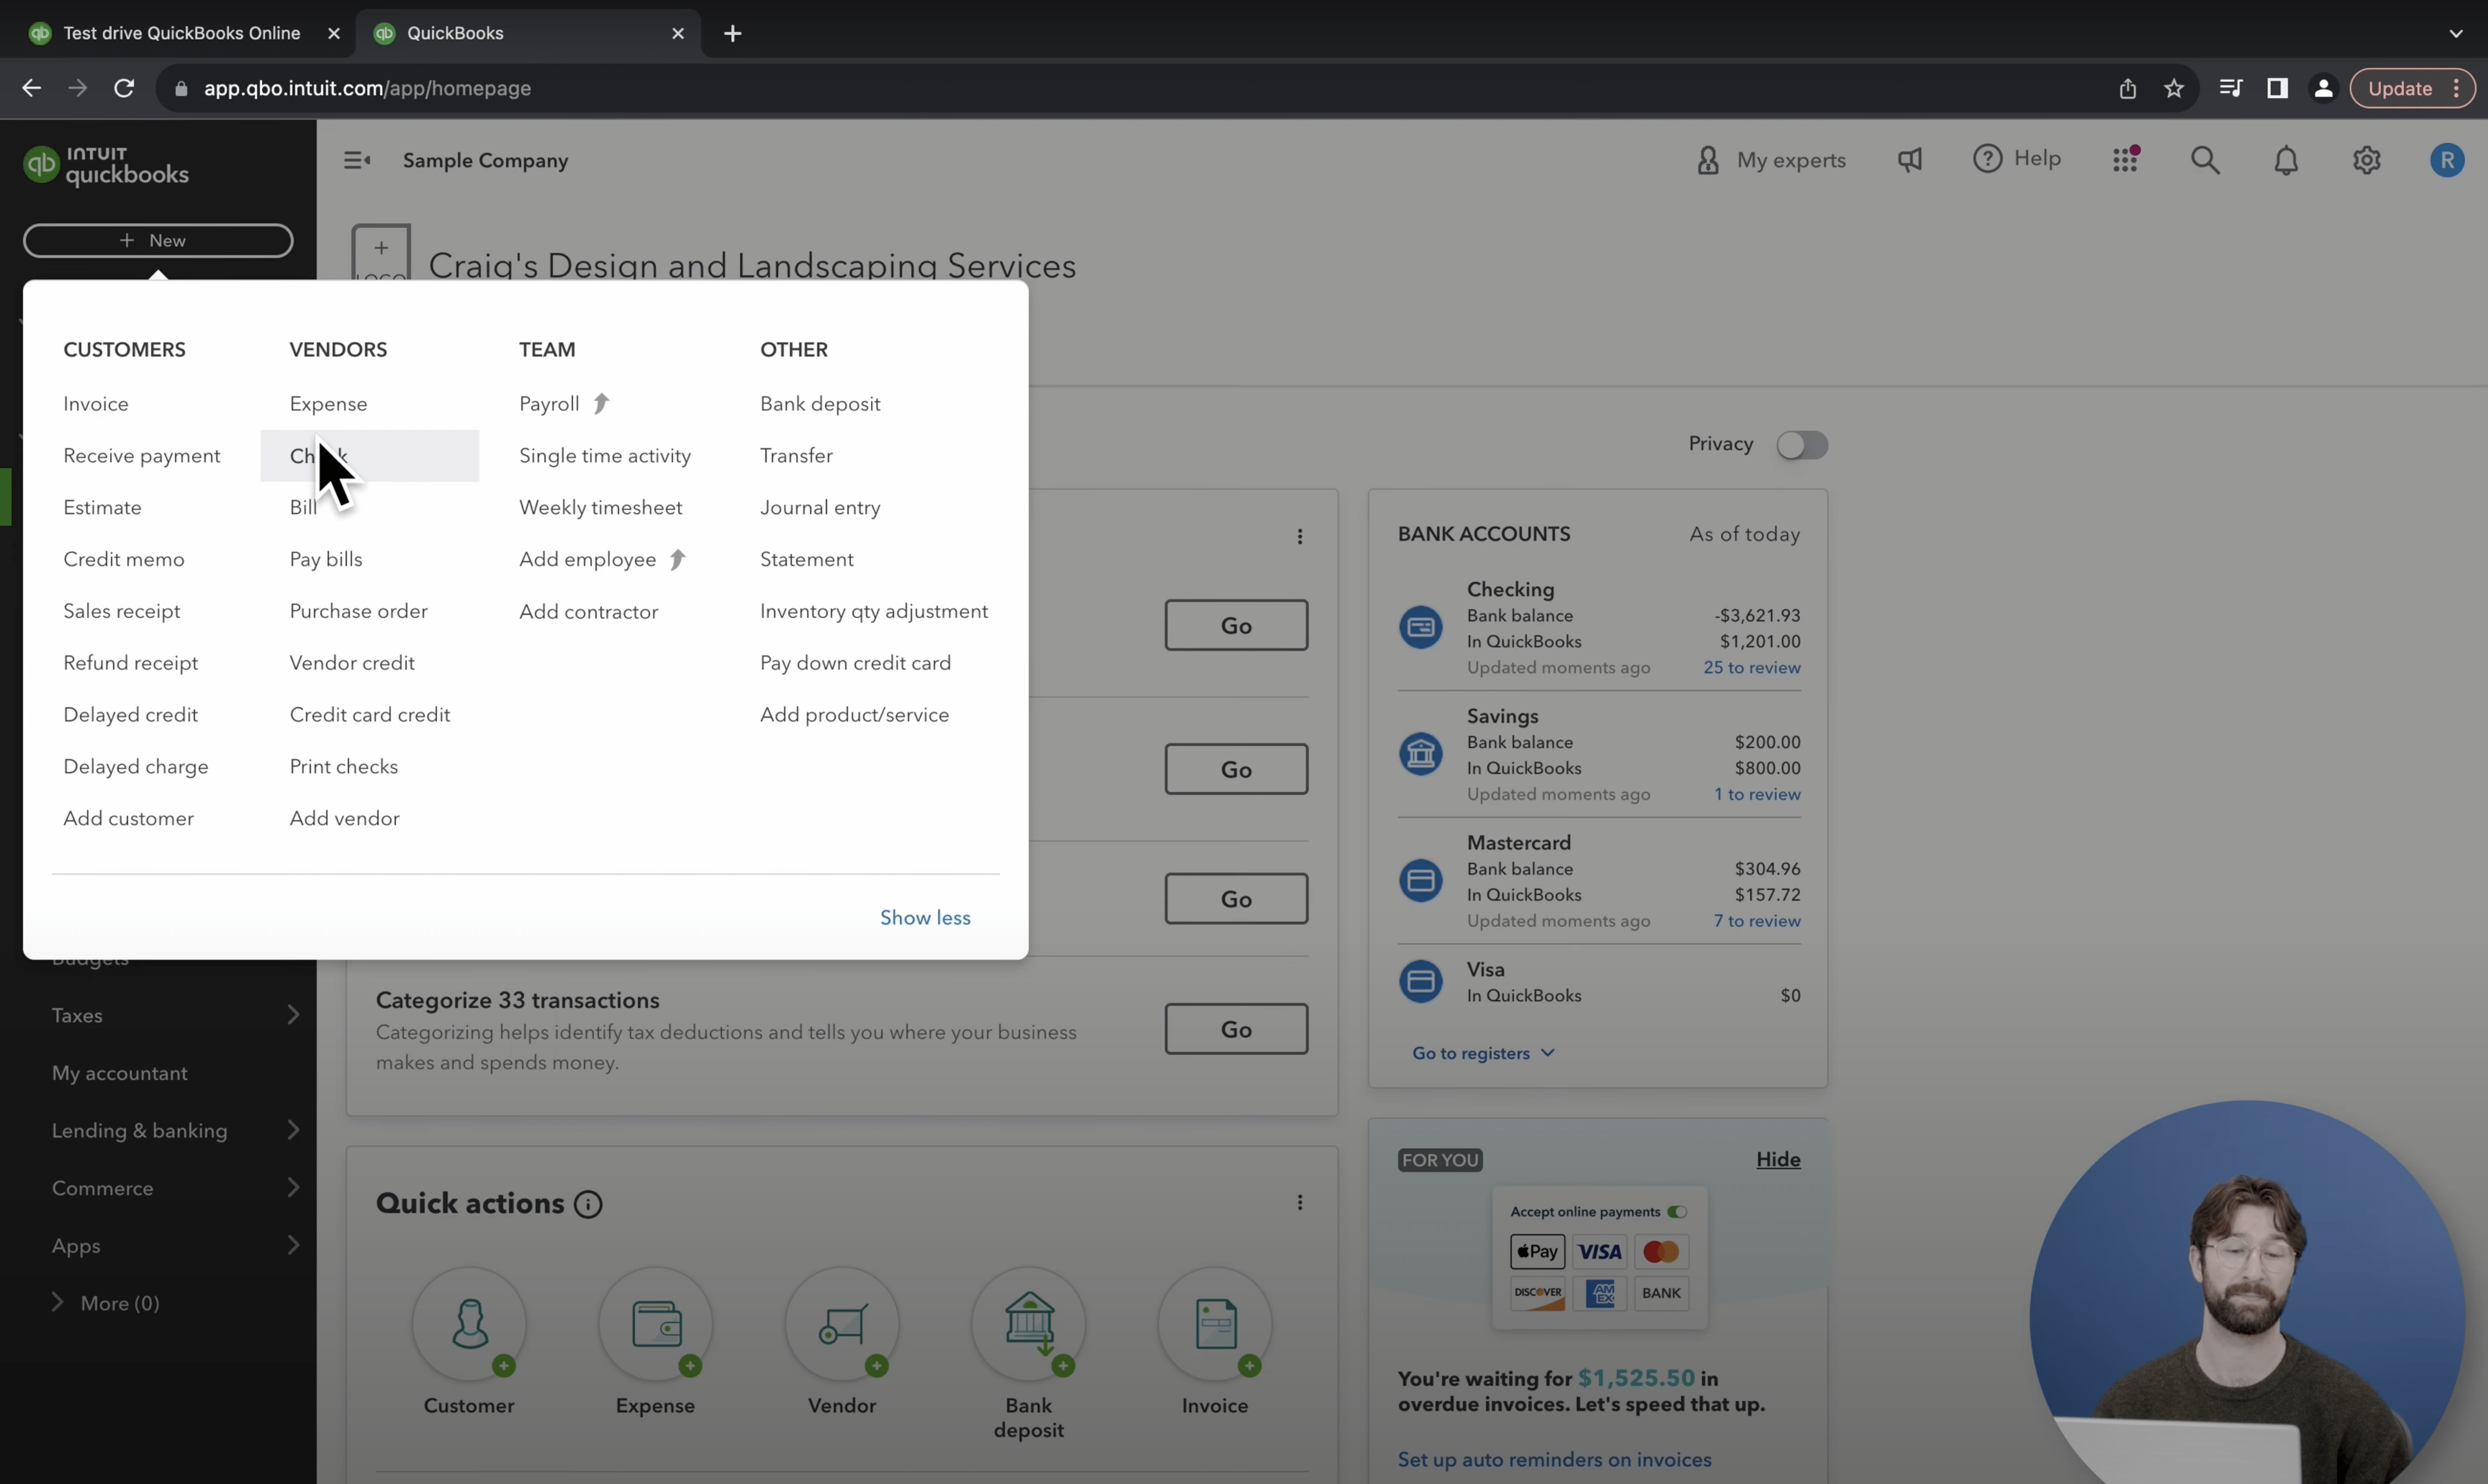
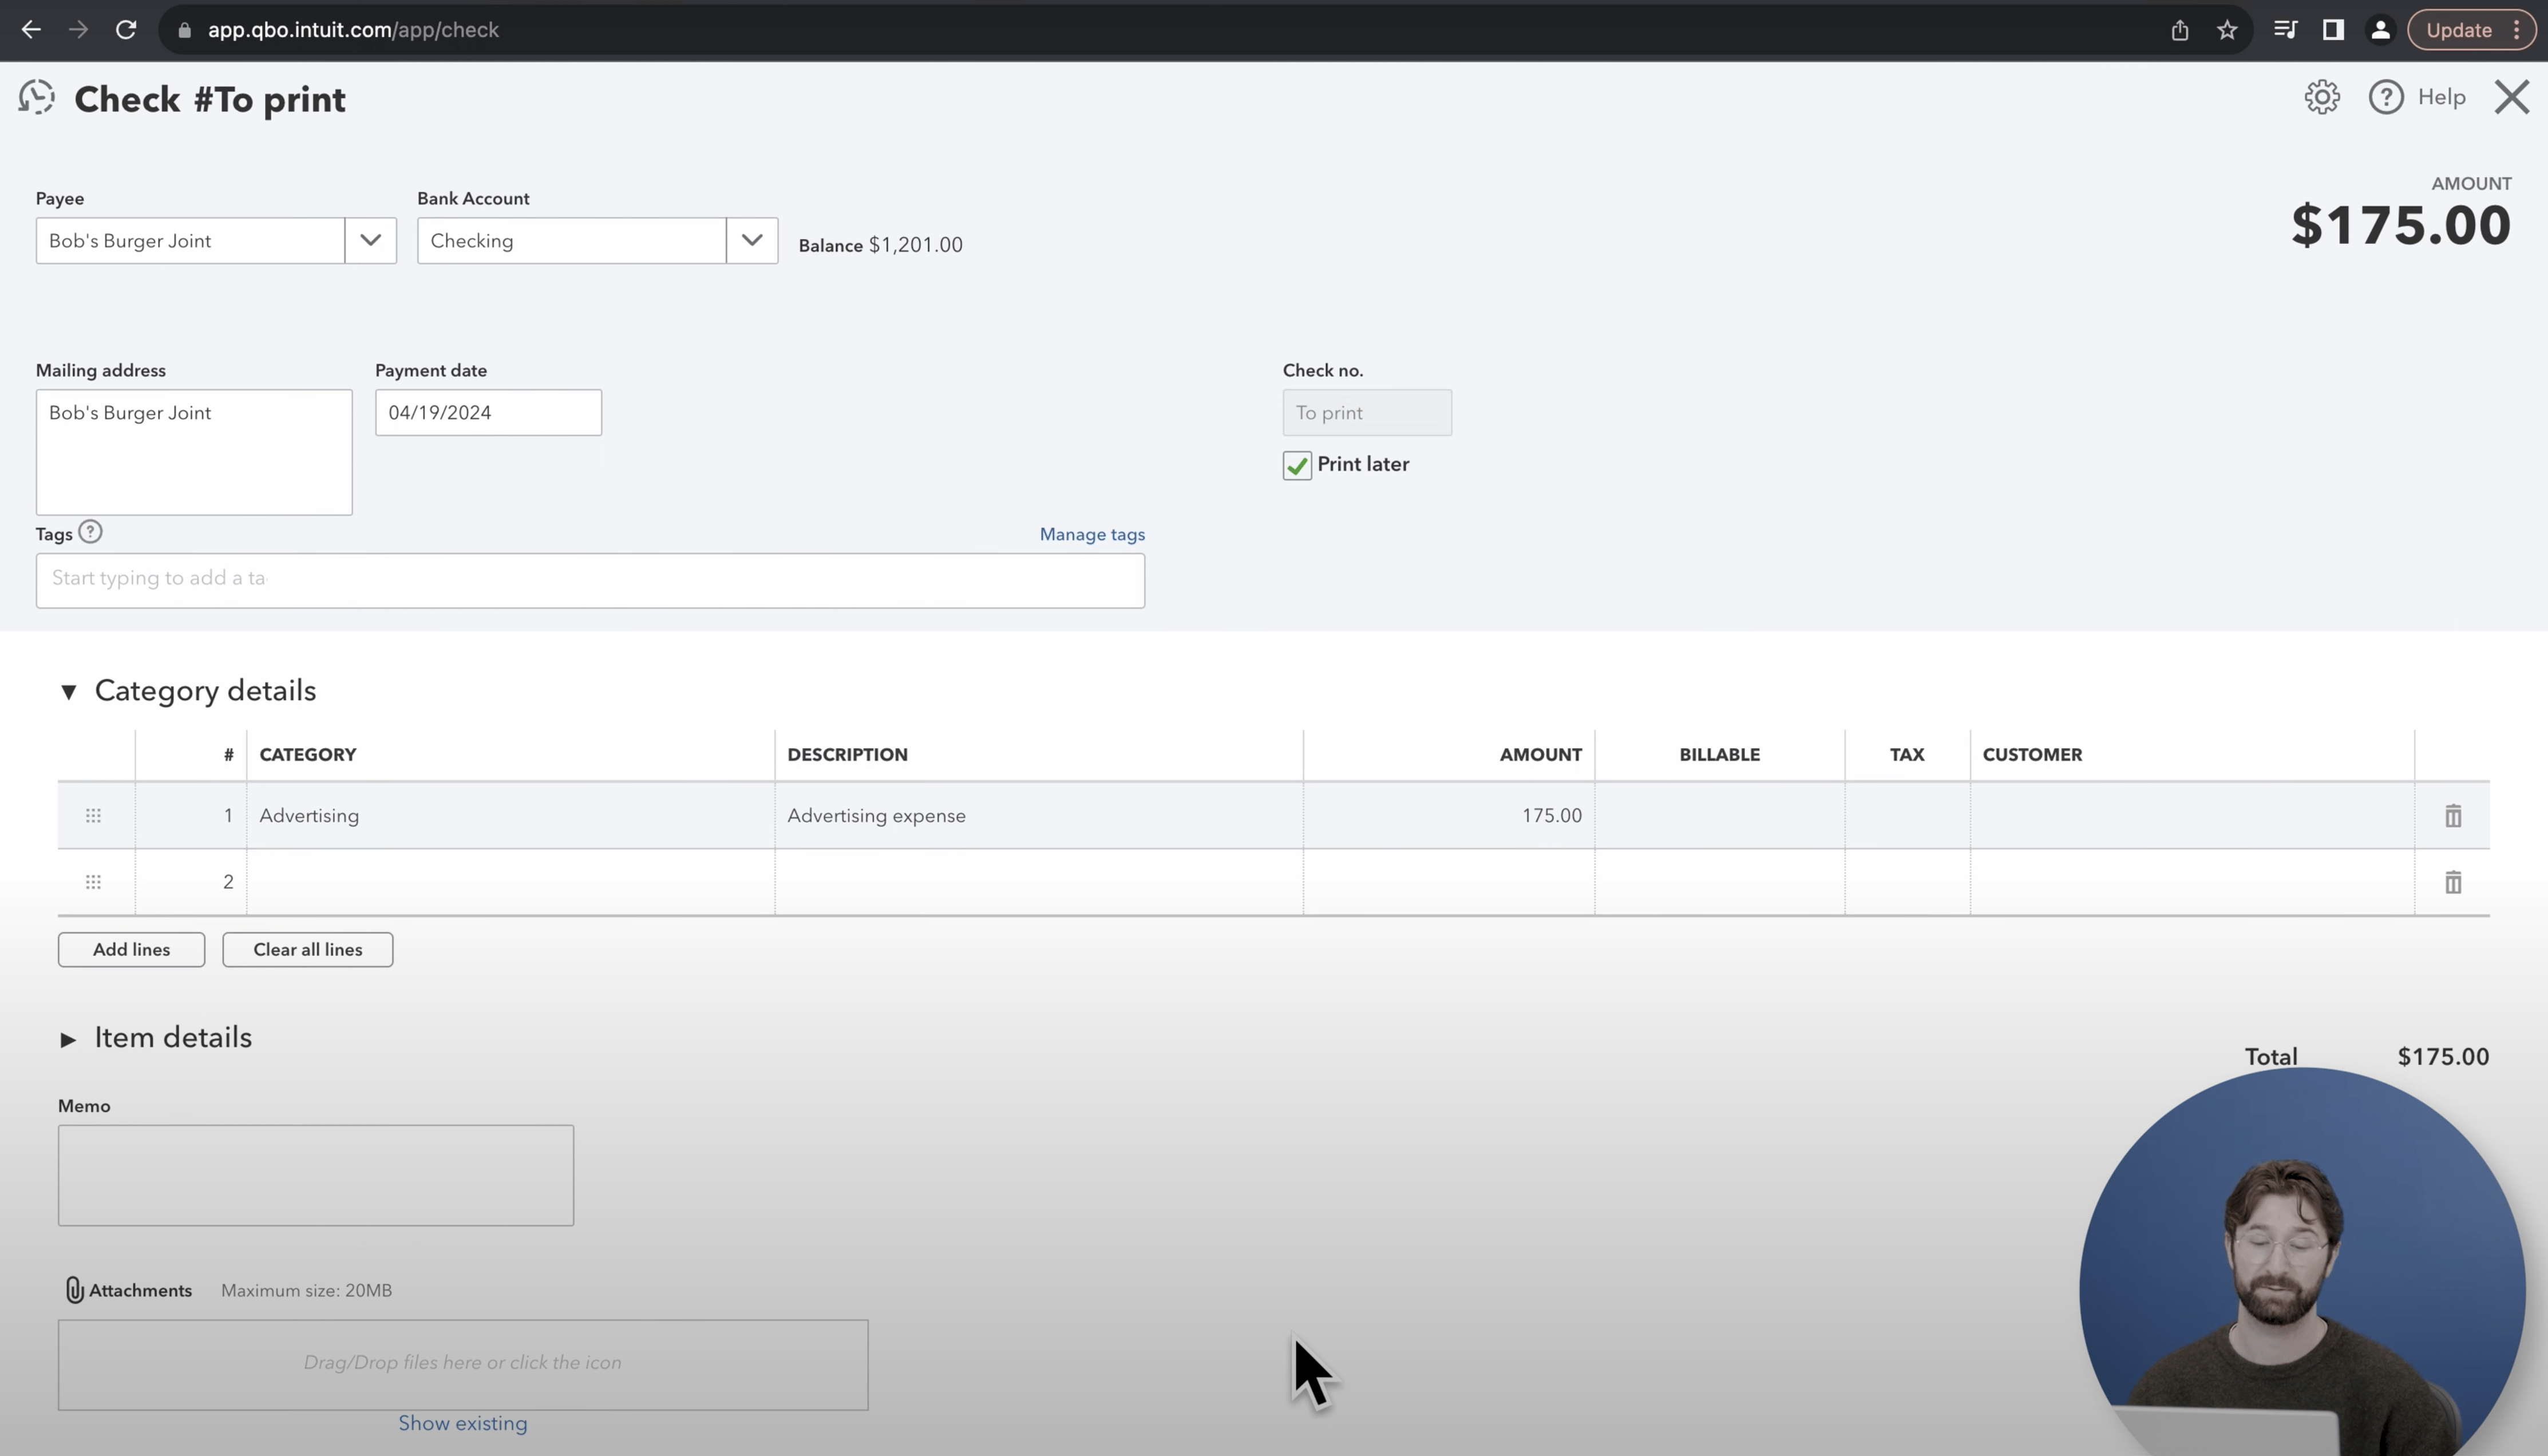
Once you’re on the main check screen, you’ll want to fill in all of the required information, starting with the payee.
Once the payee is selected, you’ll see that the mailing address is automatically inputted.
From there, you will want to fill in the check number if it’s a physical check. If you’re doing all this online, select “print later.”
Then, you’ll input the category.
Enter in the description.
Then, enter the total amount of the check.
That’s all the information you need before printing out the check.
Printing checks from QuickBooks
To print the check, go to the bottom of the screen and select “print check.”
After you select the “print check” option, you’ll be sent to the print check setup page, where you should ensure all the settings are correct before you start printing.
After verifying these settings, you’ll select “Yes, I’m finished with setup” at the bottom right of the screen.
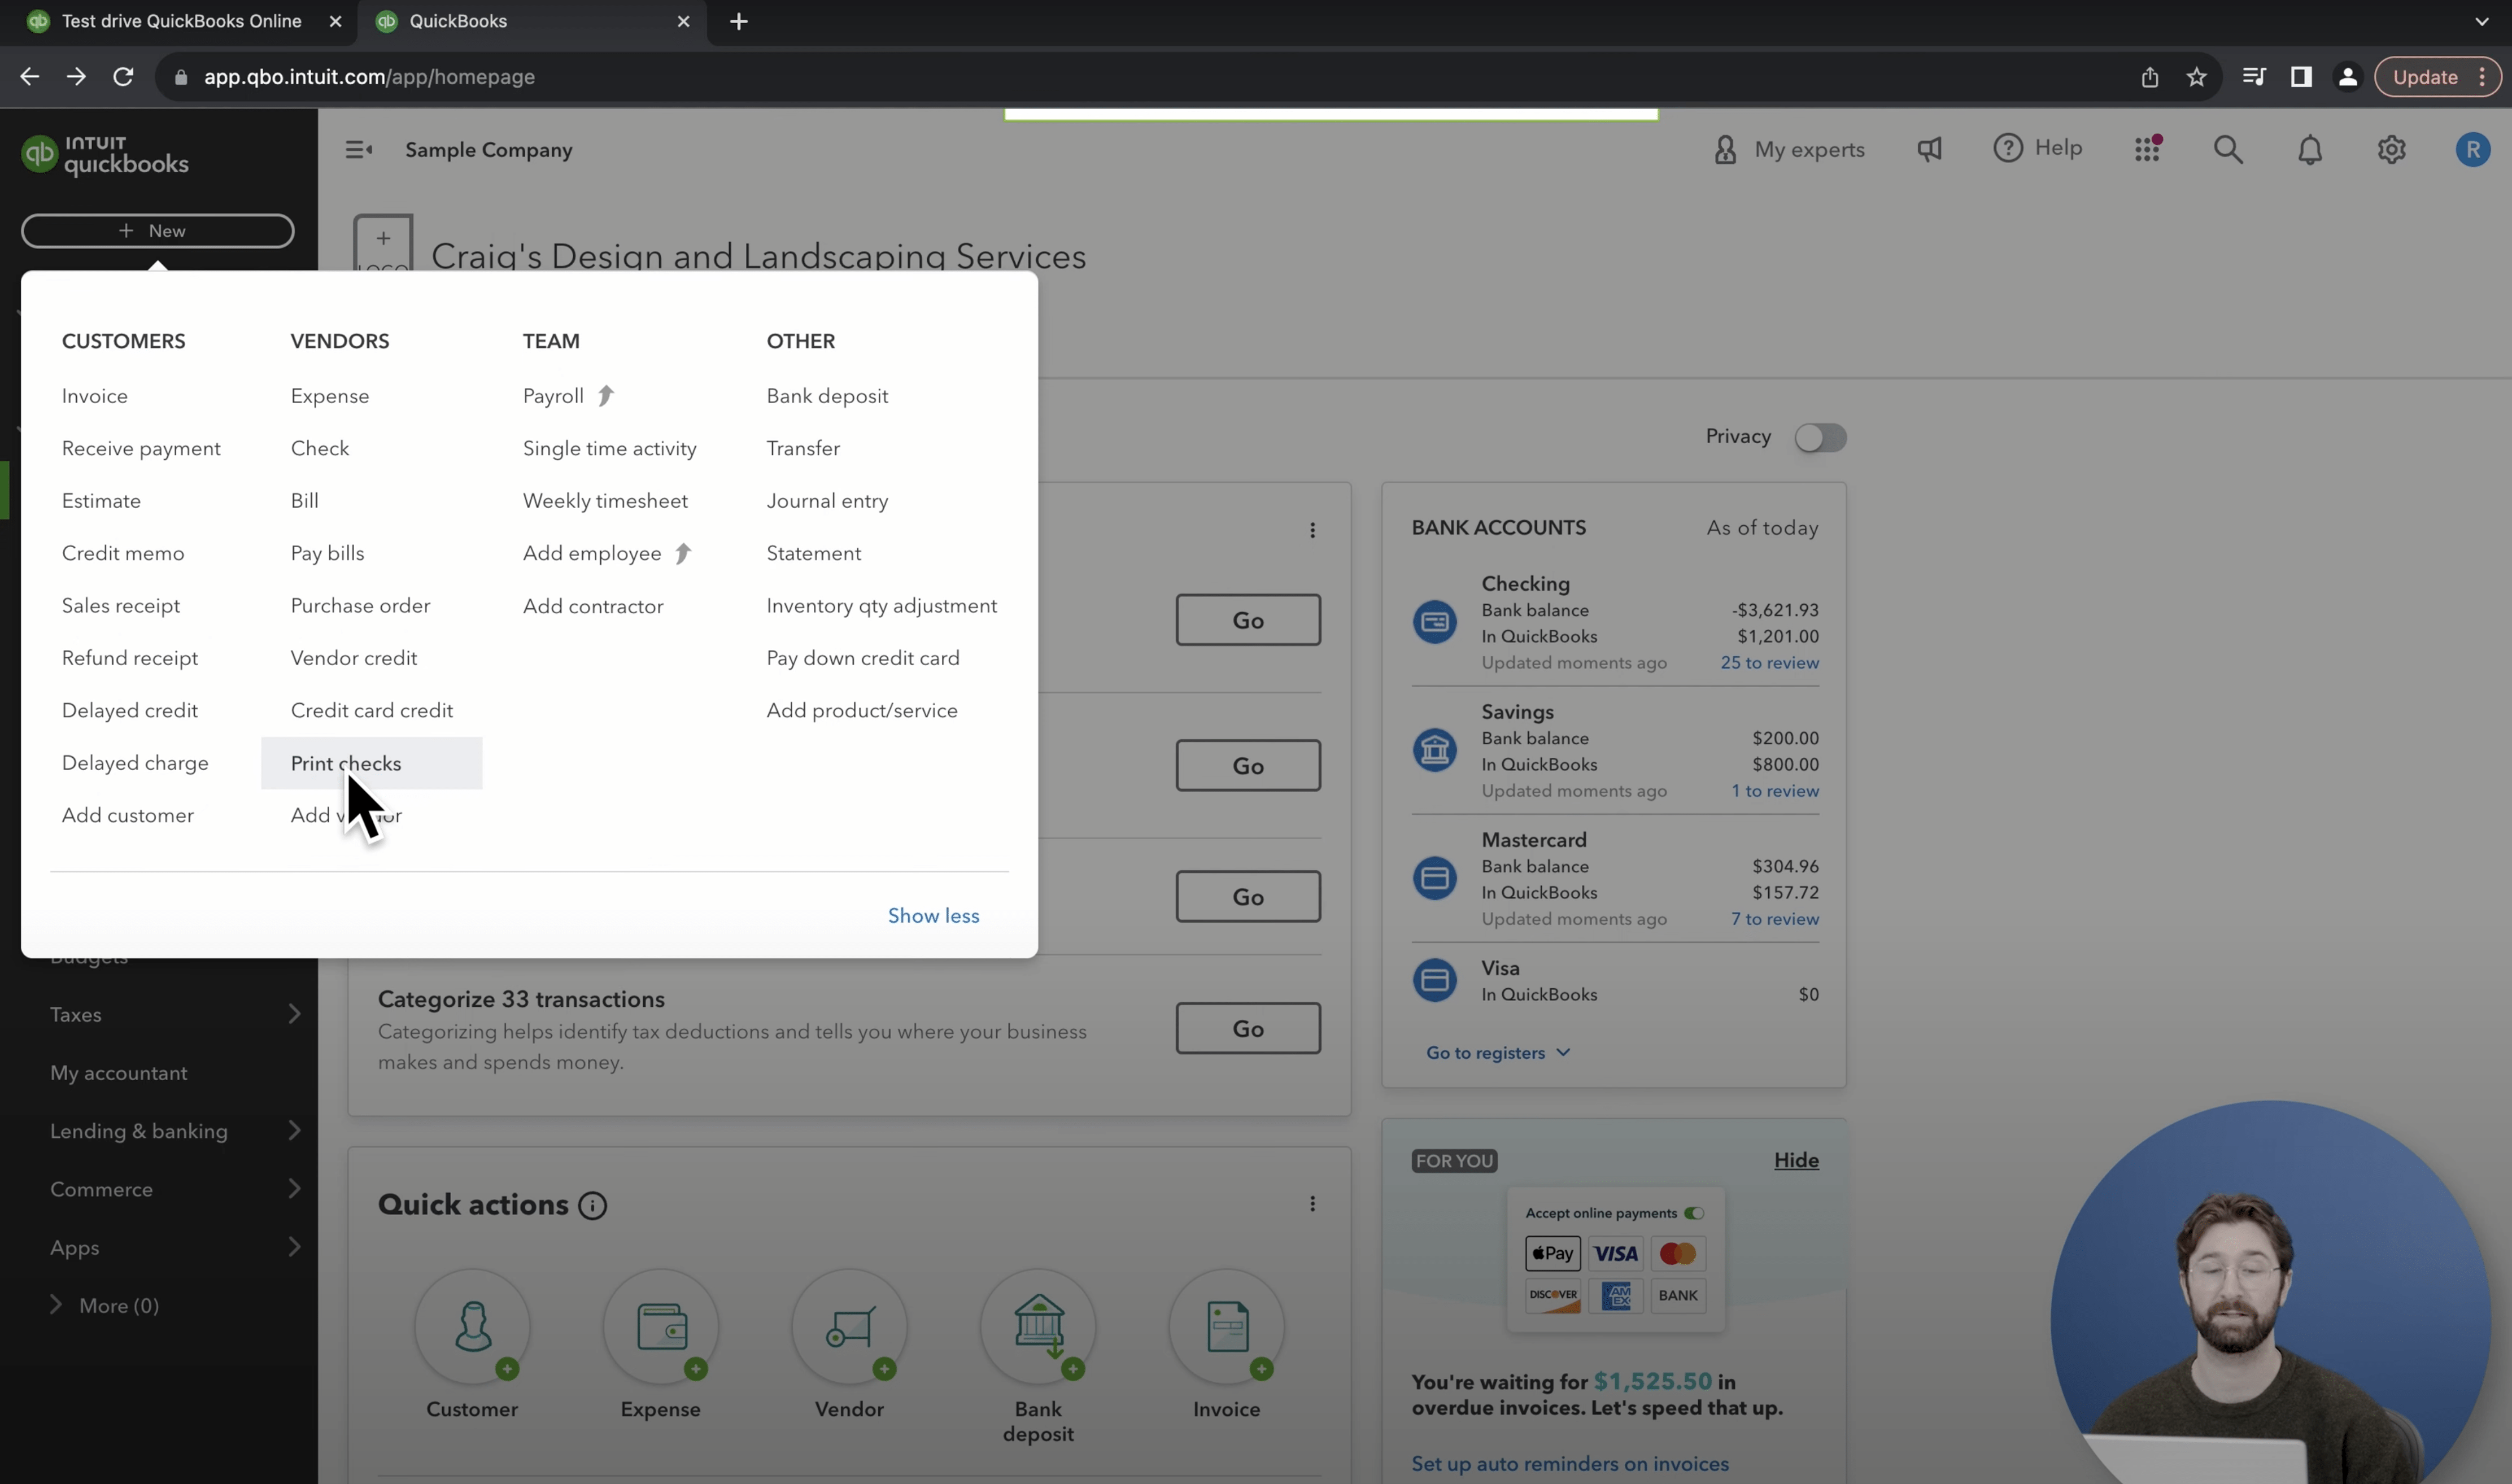
Once you finish the print check setup, you’ll be sent back to the main dashboard. Go to the top left corner of the screen and select “new.”
Select “print checks,” and then you’ll be sent to a page showing all the saved checks.
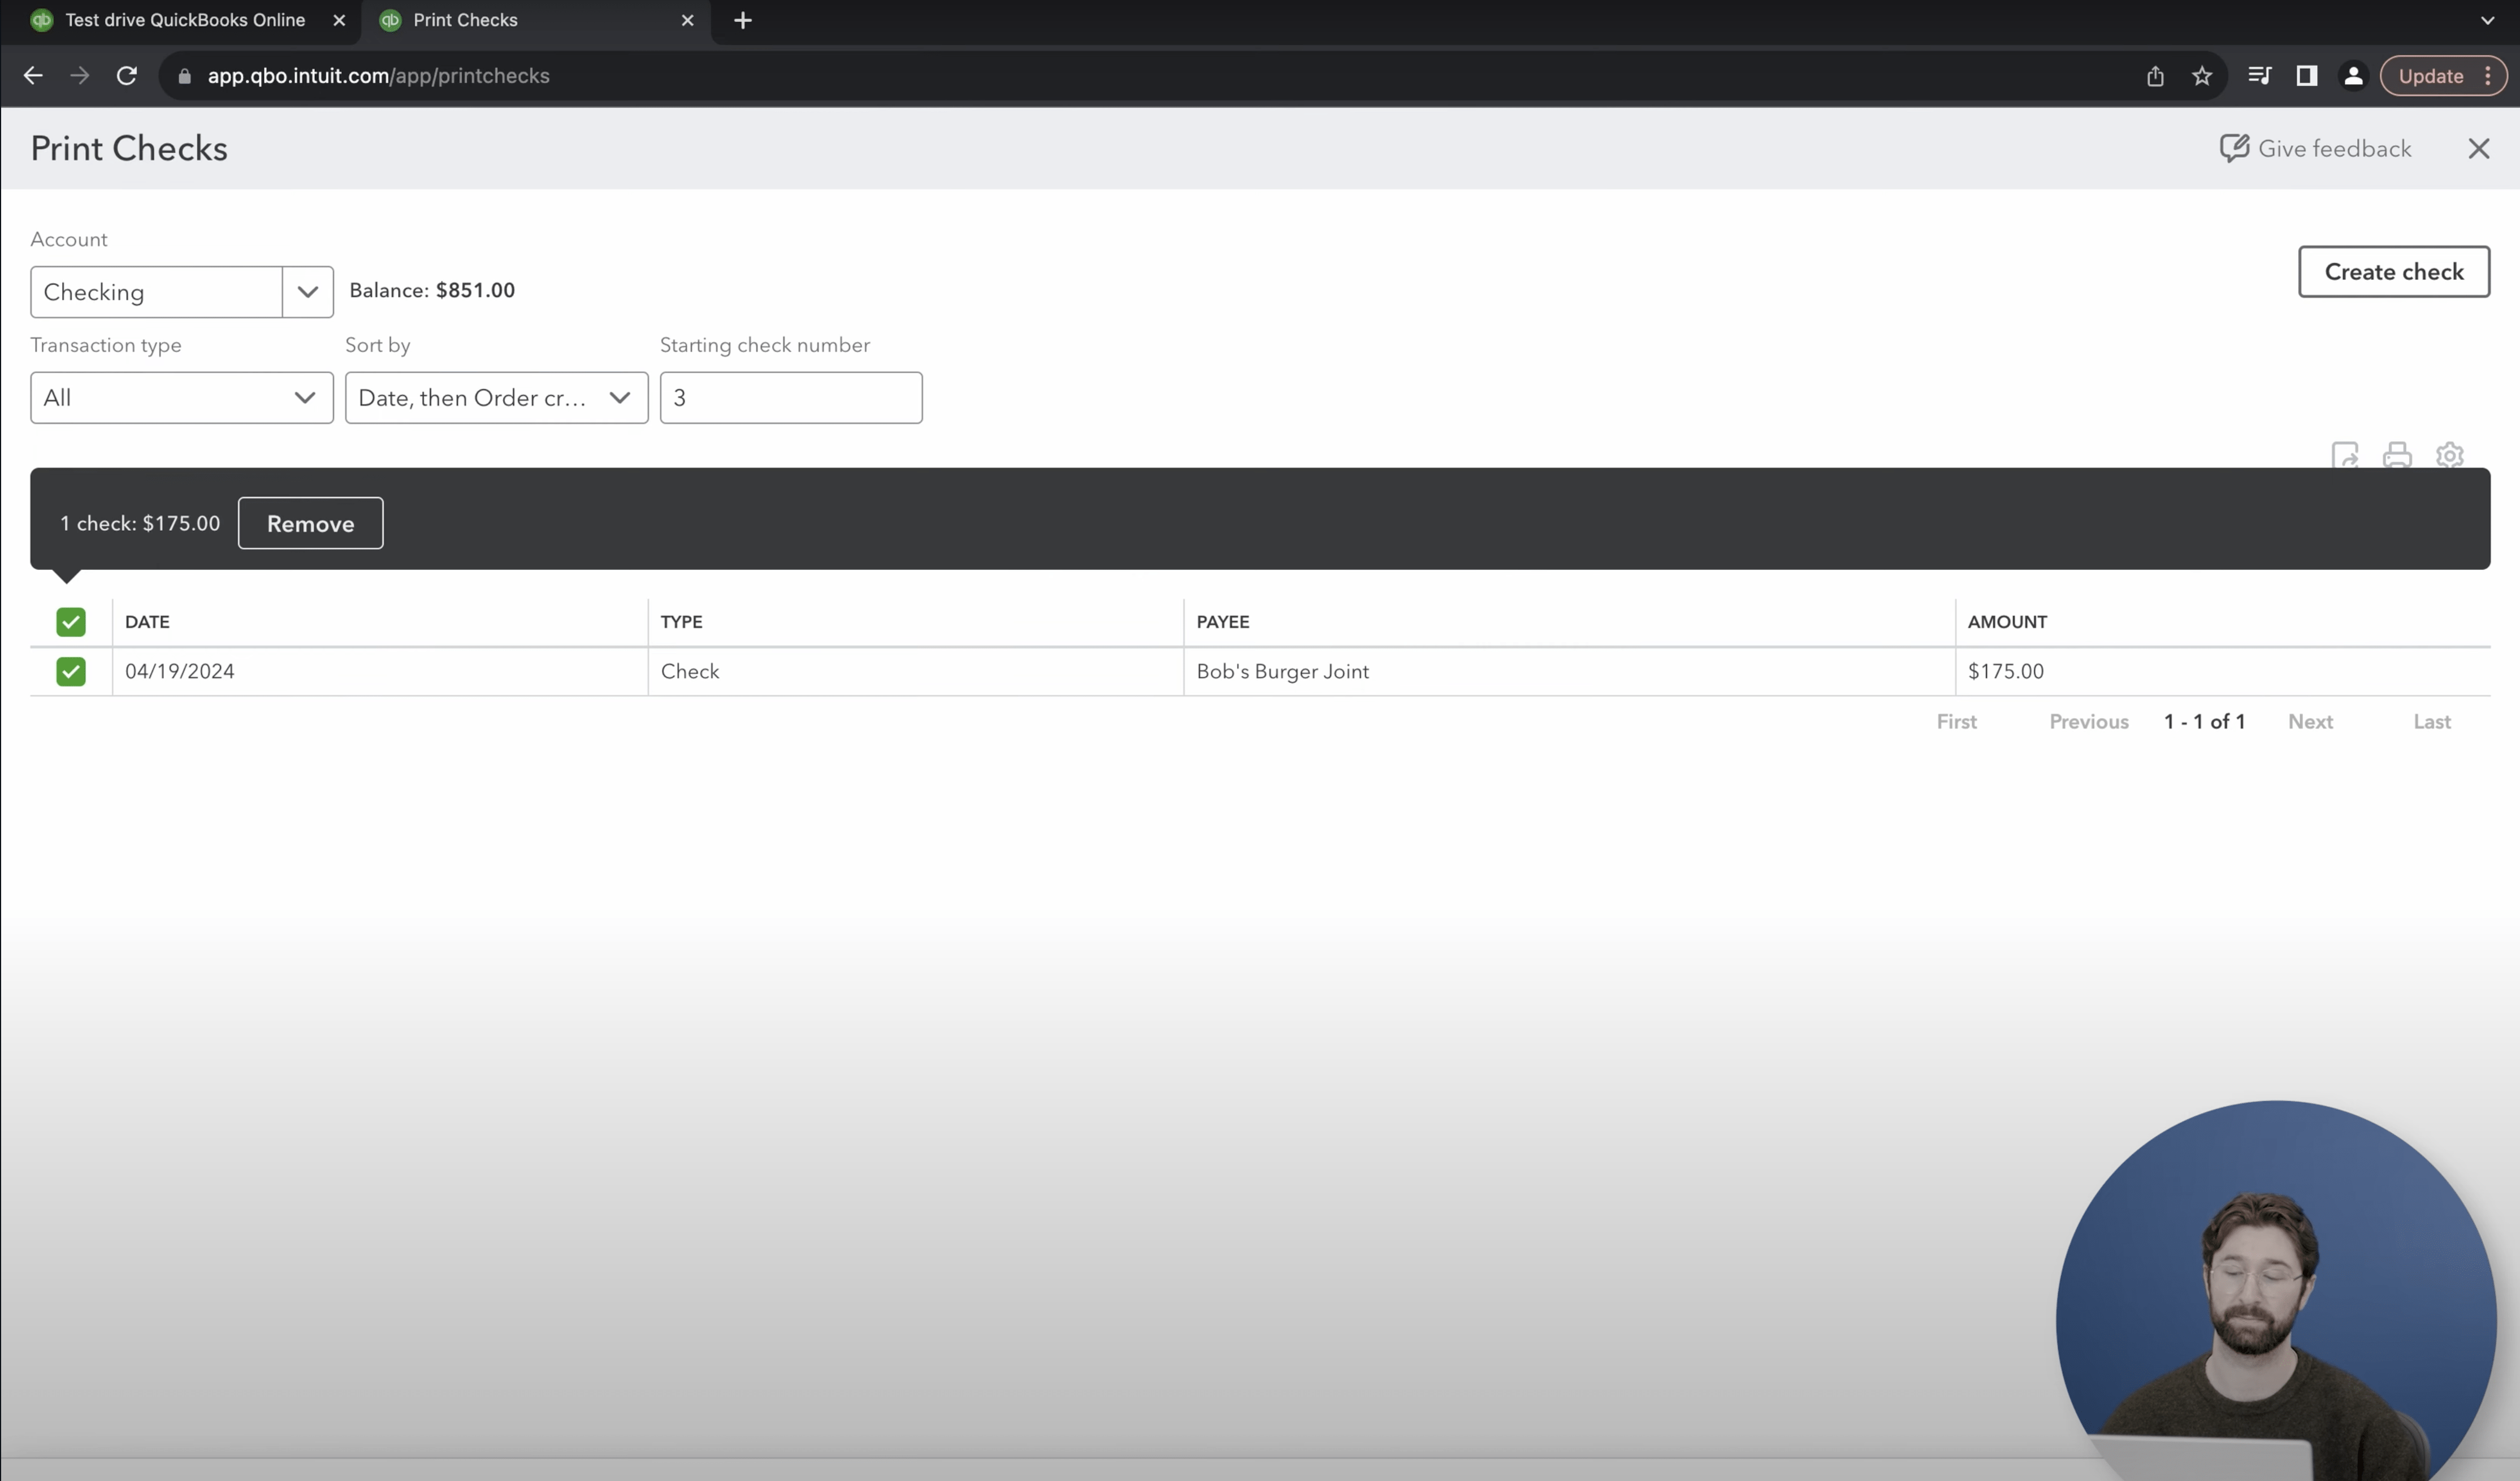
Go to the bottom right corner of the screen and select “preview and print.”
Then you’ll see a preview of your check. If everything is accurate, you can go ahead and print out your check.
QuickBooks Online Integrations: Enhance Your Workflow
Did you find this tutorial helpful? Streamline your QuickBooks Online experience even further with a QuickBooks Online payment processing integration. Explore how integrating QuickBooks Online with tools like EBizCharge can enhance your workflow, automate processes, and boost productivity. Unlock the full potential of your QuickBooks environment today!

