Video Center > QuickBooks Online Tutorials > QuickBooks Online
Video: How to Void a Check in QuickBooks Online
Video: How to Void a Check in QuickBooks Online
Using an accounting system like QuickBooks will help your business better manage its invoices and reduce human error but mistakes can still happen.
Whether you typed in the incorrect amount or issued a check to the wrong party, you can void this payment in QuickBooks using a few simple steps.
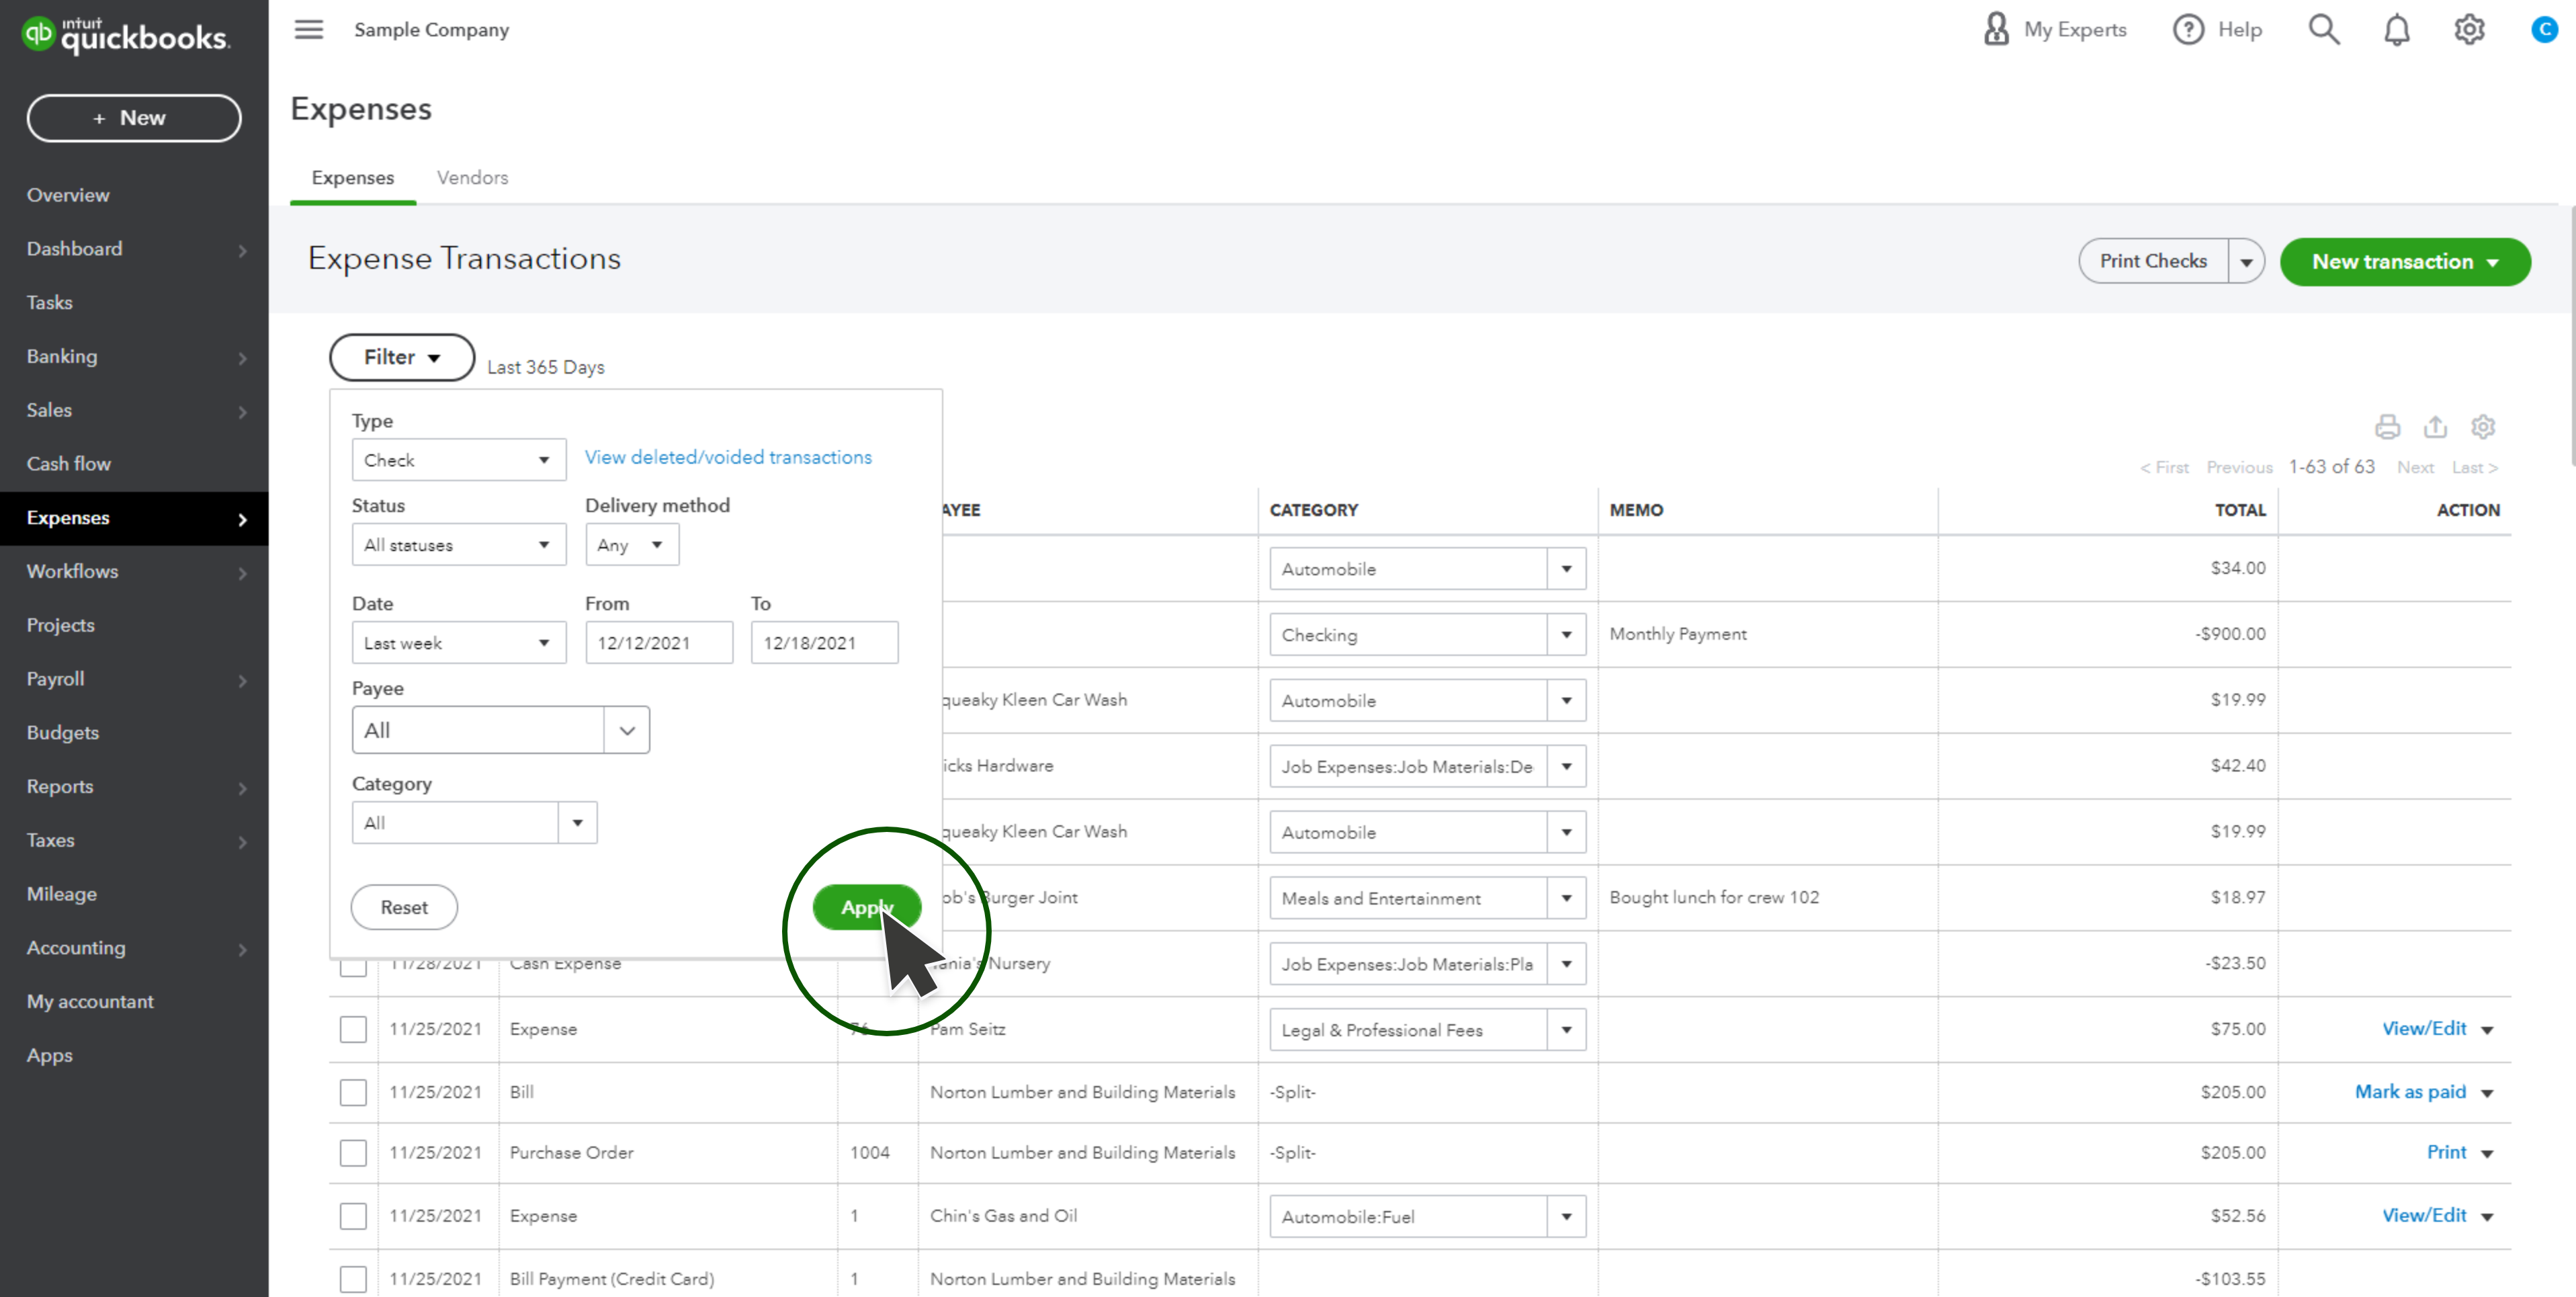
- Navigate to your QuickBooks Check Page.
- Click the Expenses tab, then select Filter.
- In the Type field, click on Check.
- Select the date range that the check you want to void was received, then click Apply.
- Select the check you wish to void from the Expense Transactions list. This will prompt the Check screen to open.
- Click More, then select Void from the pop-up menu that appears.
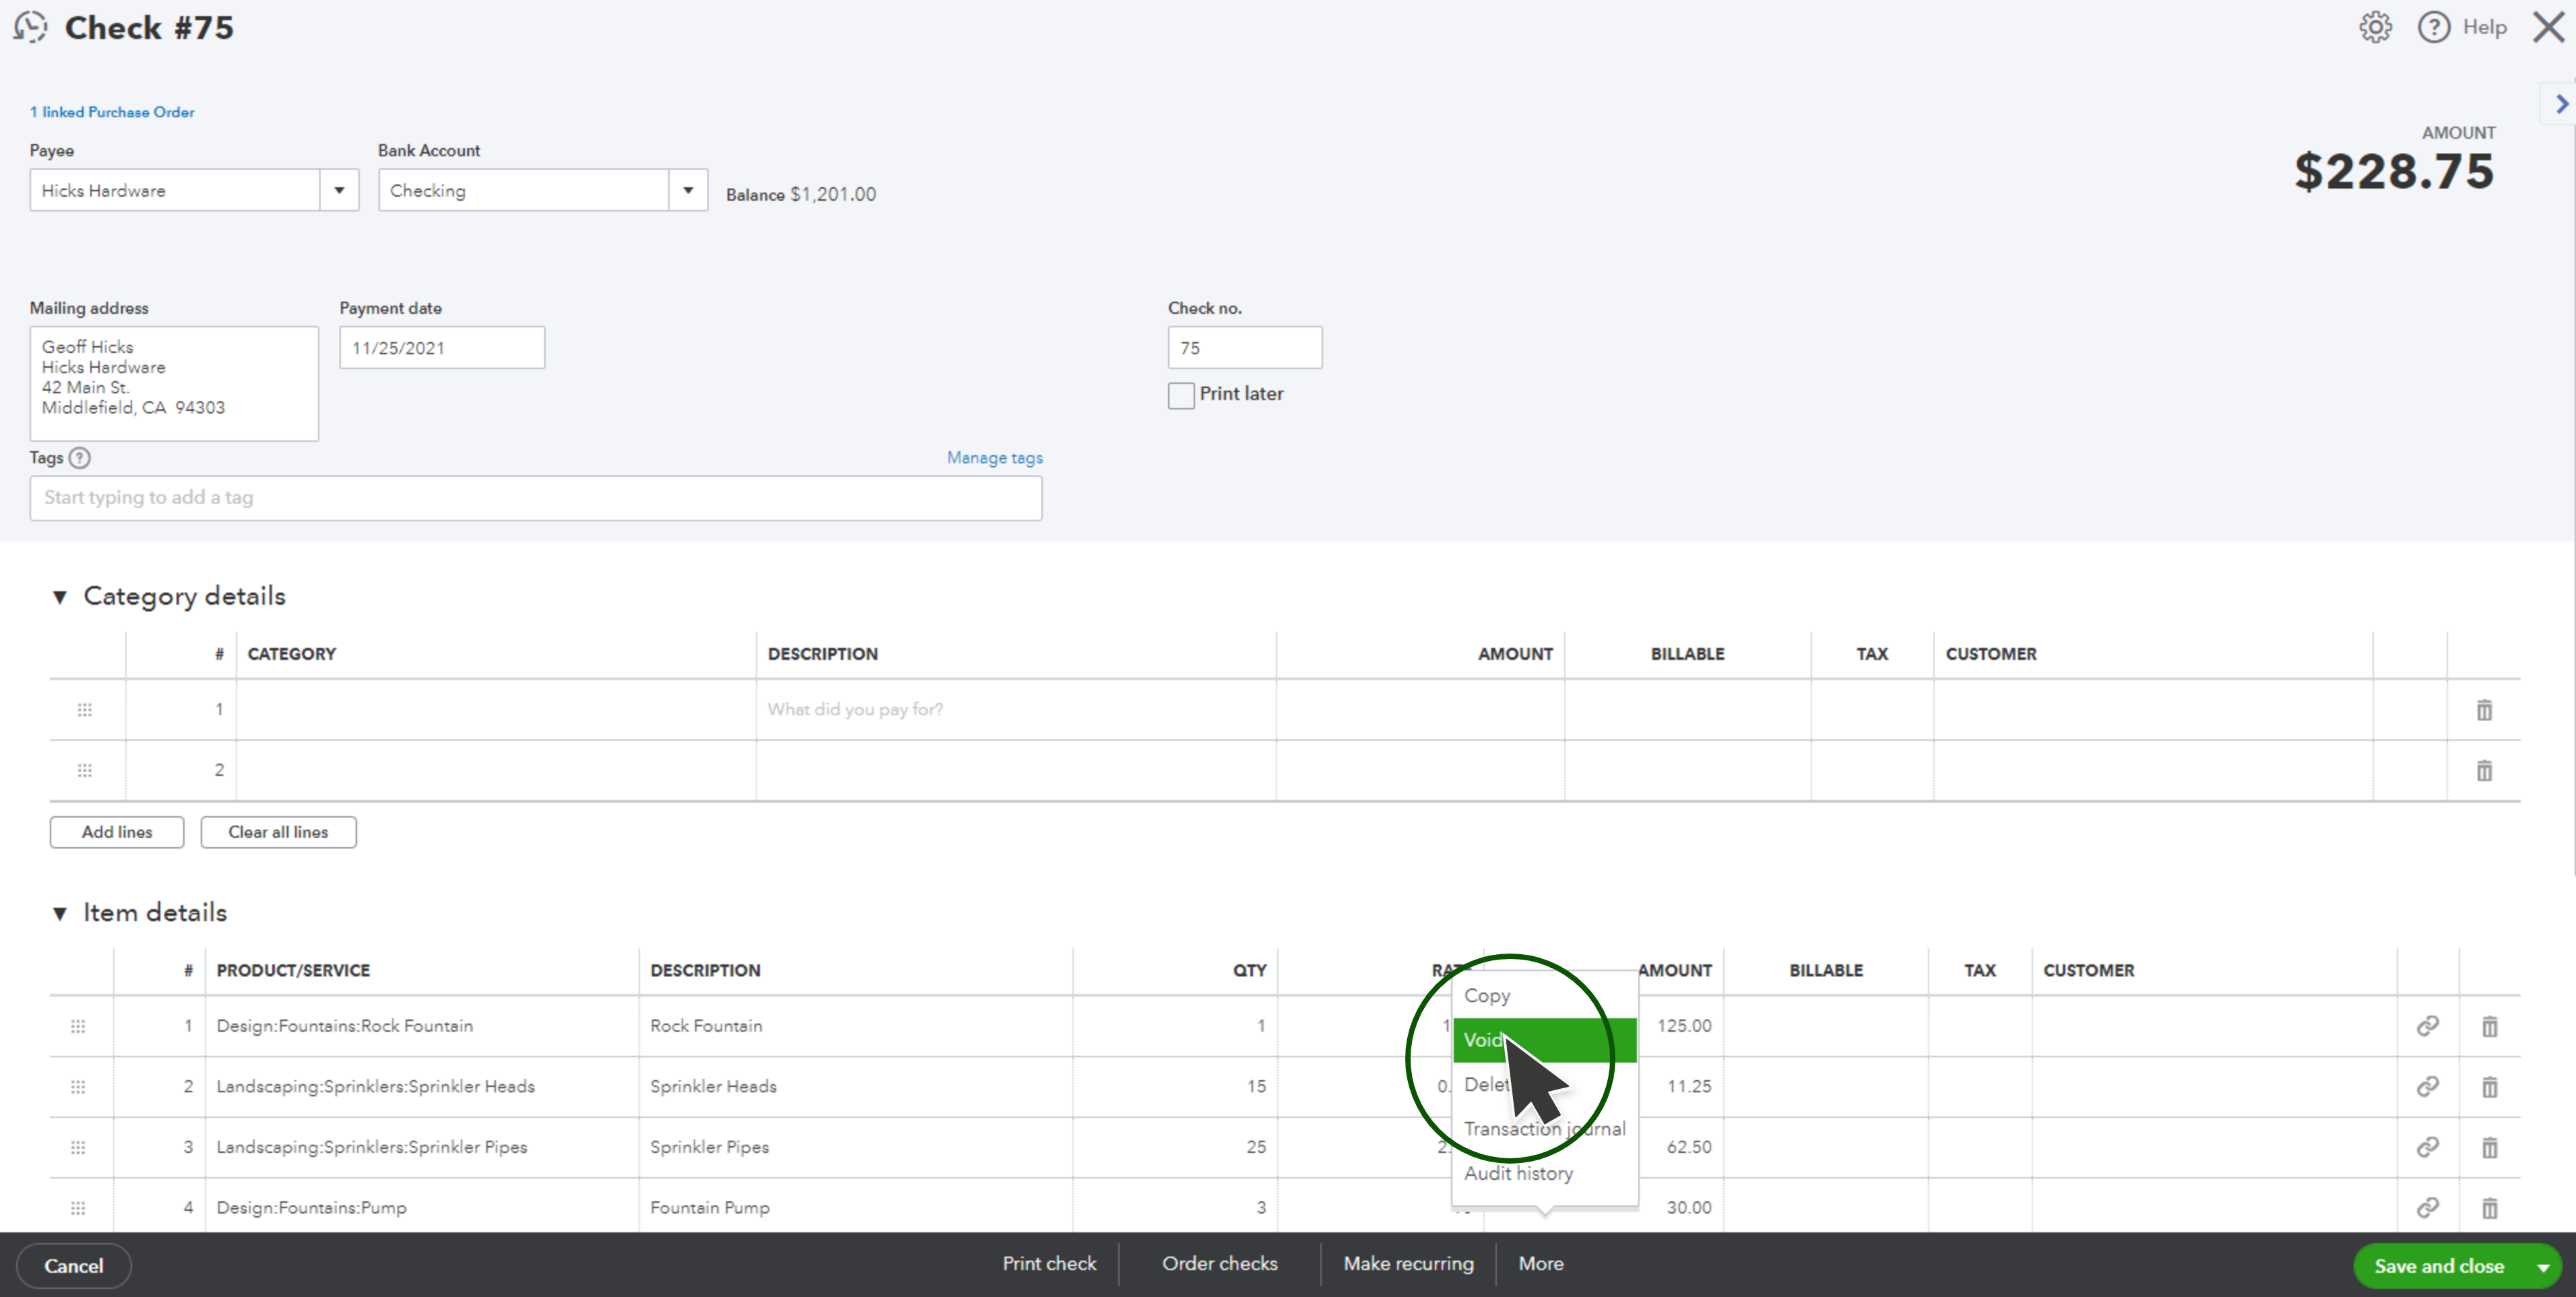
- You’ll be prompted to confirm that you want to void the selected check, click Yes to confirm.
- Navigate to Expenses.
- In your Expense Transactions list, find the check you wish to void.
- After finding the check you want to void, go to the Action column. A “View/Edit” drop-down menu will appear where you will select Void.
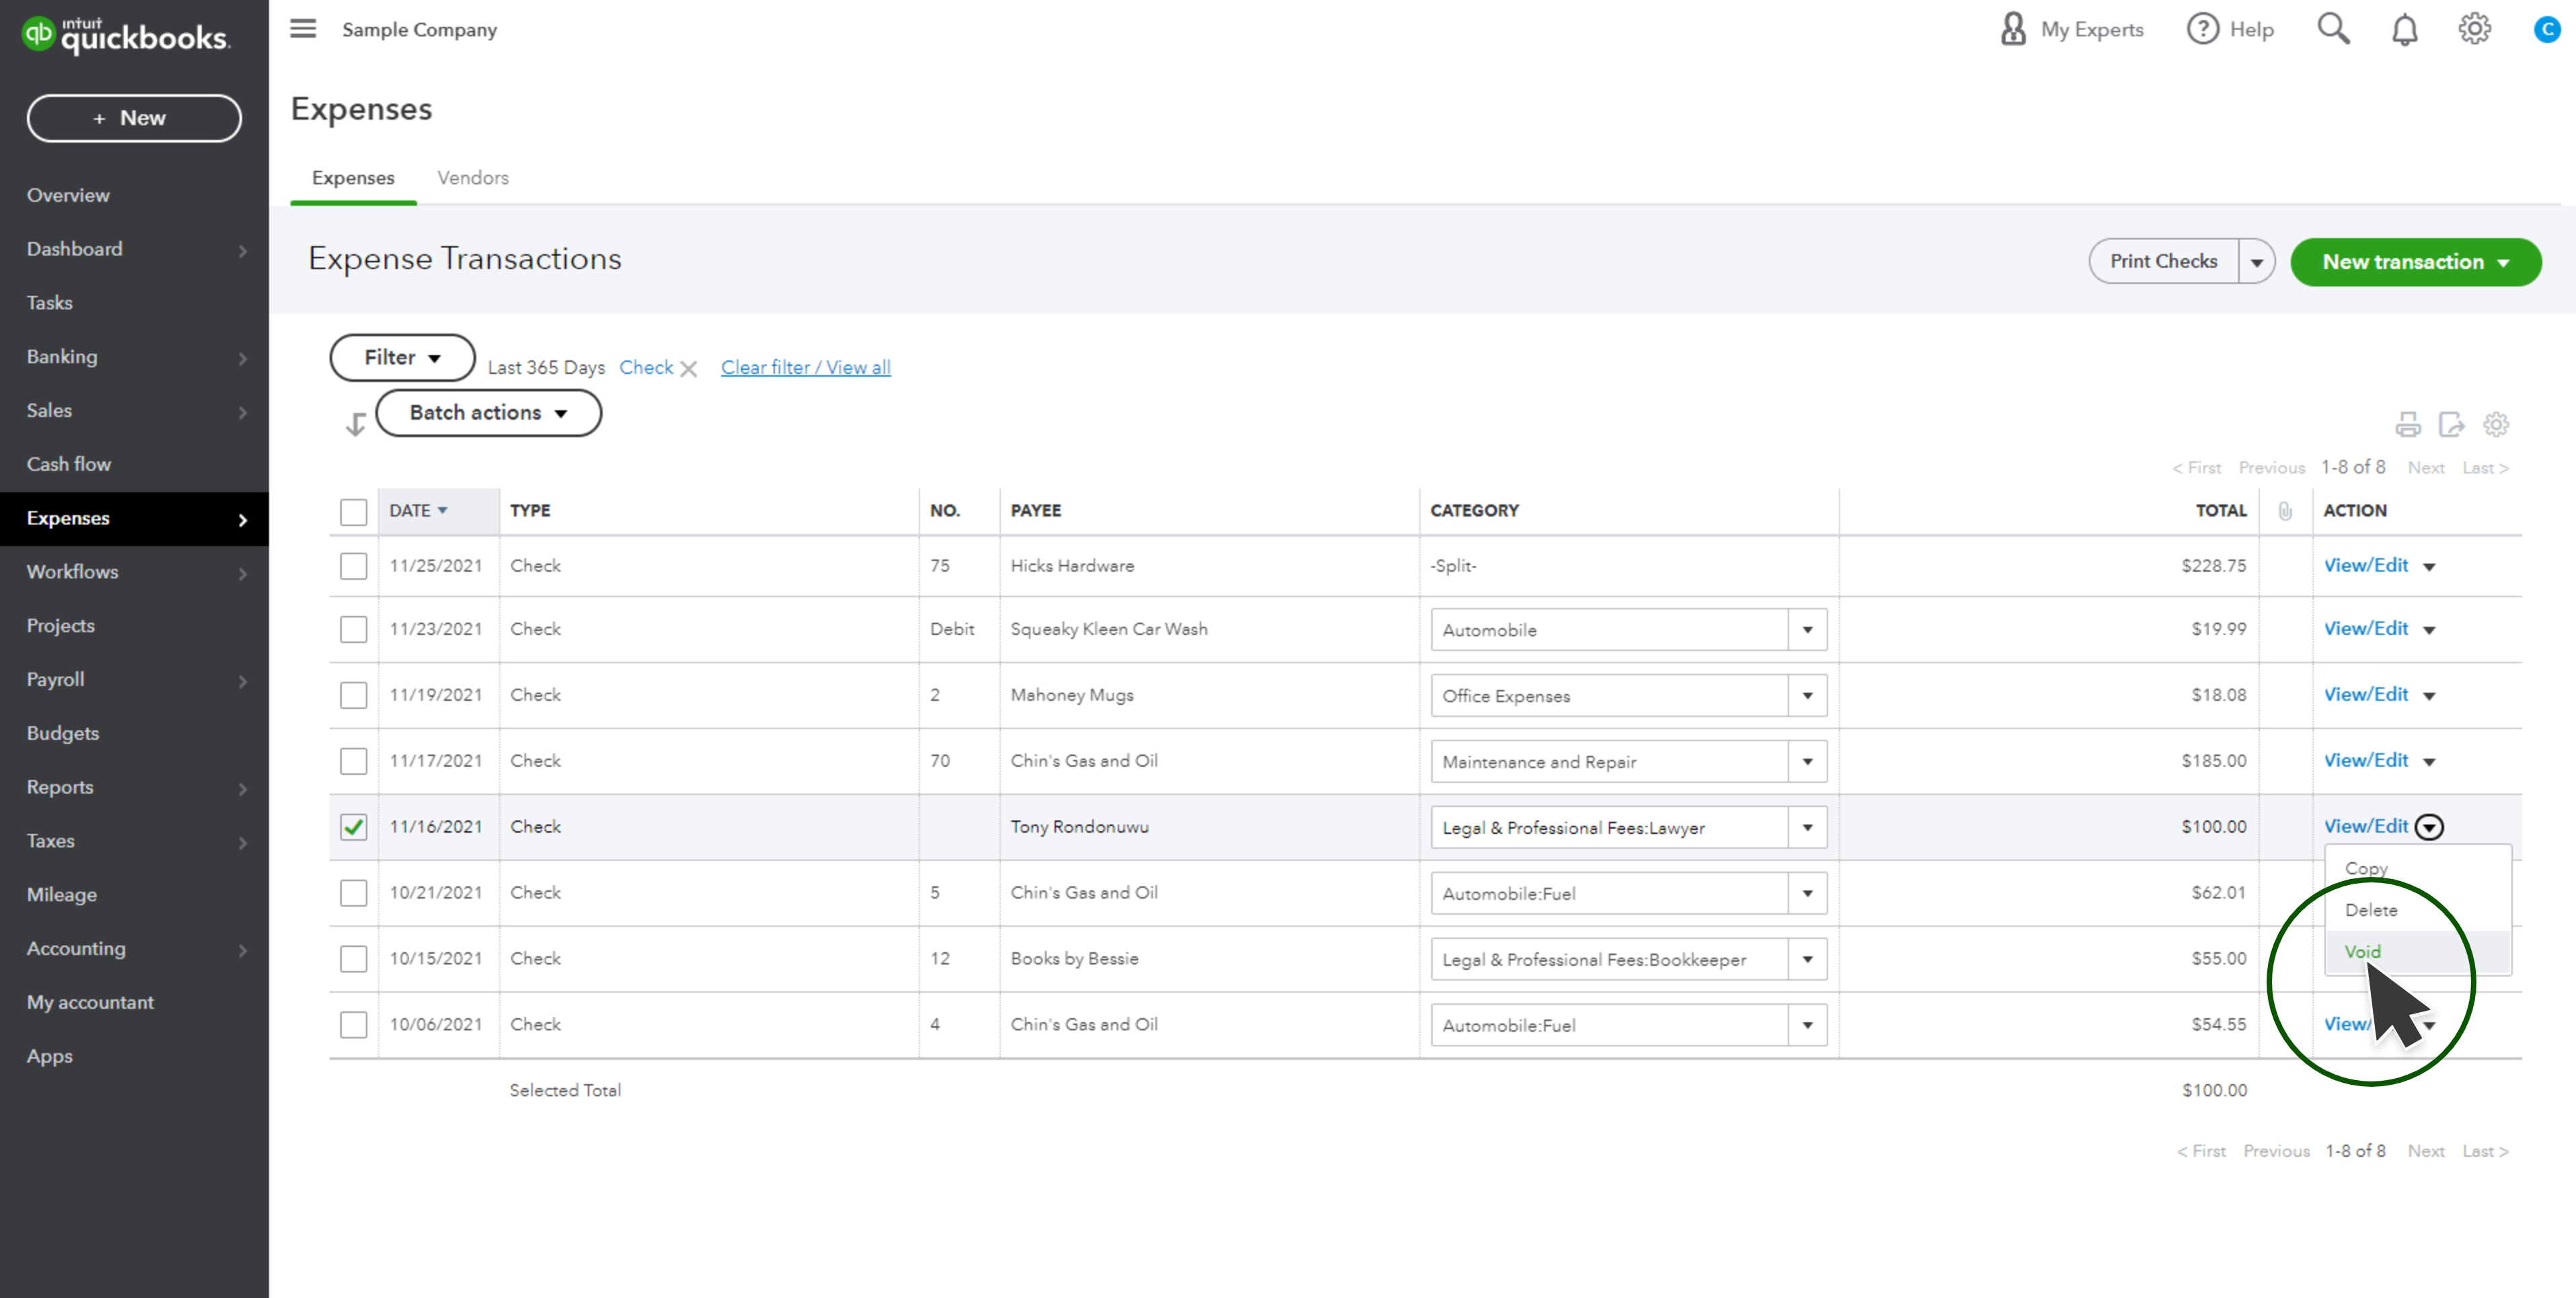
- You’ll be prompted to confirm that you want to void the selected check, click Yes to confirm.
Lastly, you can follow these 6 steps if you want to void a check that’s already been issued in QuickBooks Online:
- From the left sidebar menu, select Accounting.
- Then, click Chart of Accounts at the top of the page.
- Find and select the bank account where the check you want to void is recorded and choose View Register.
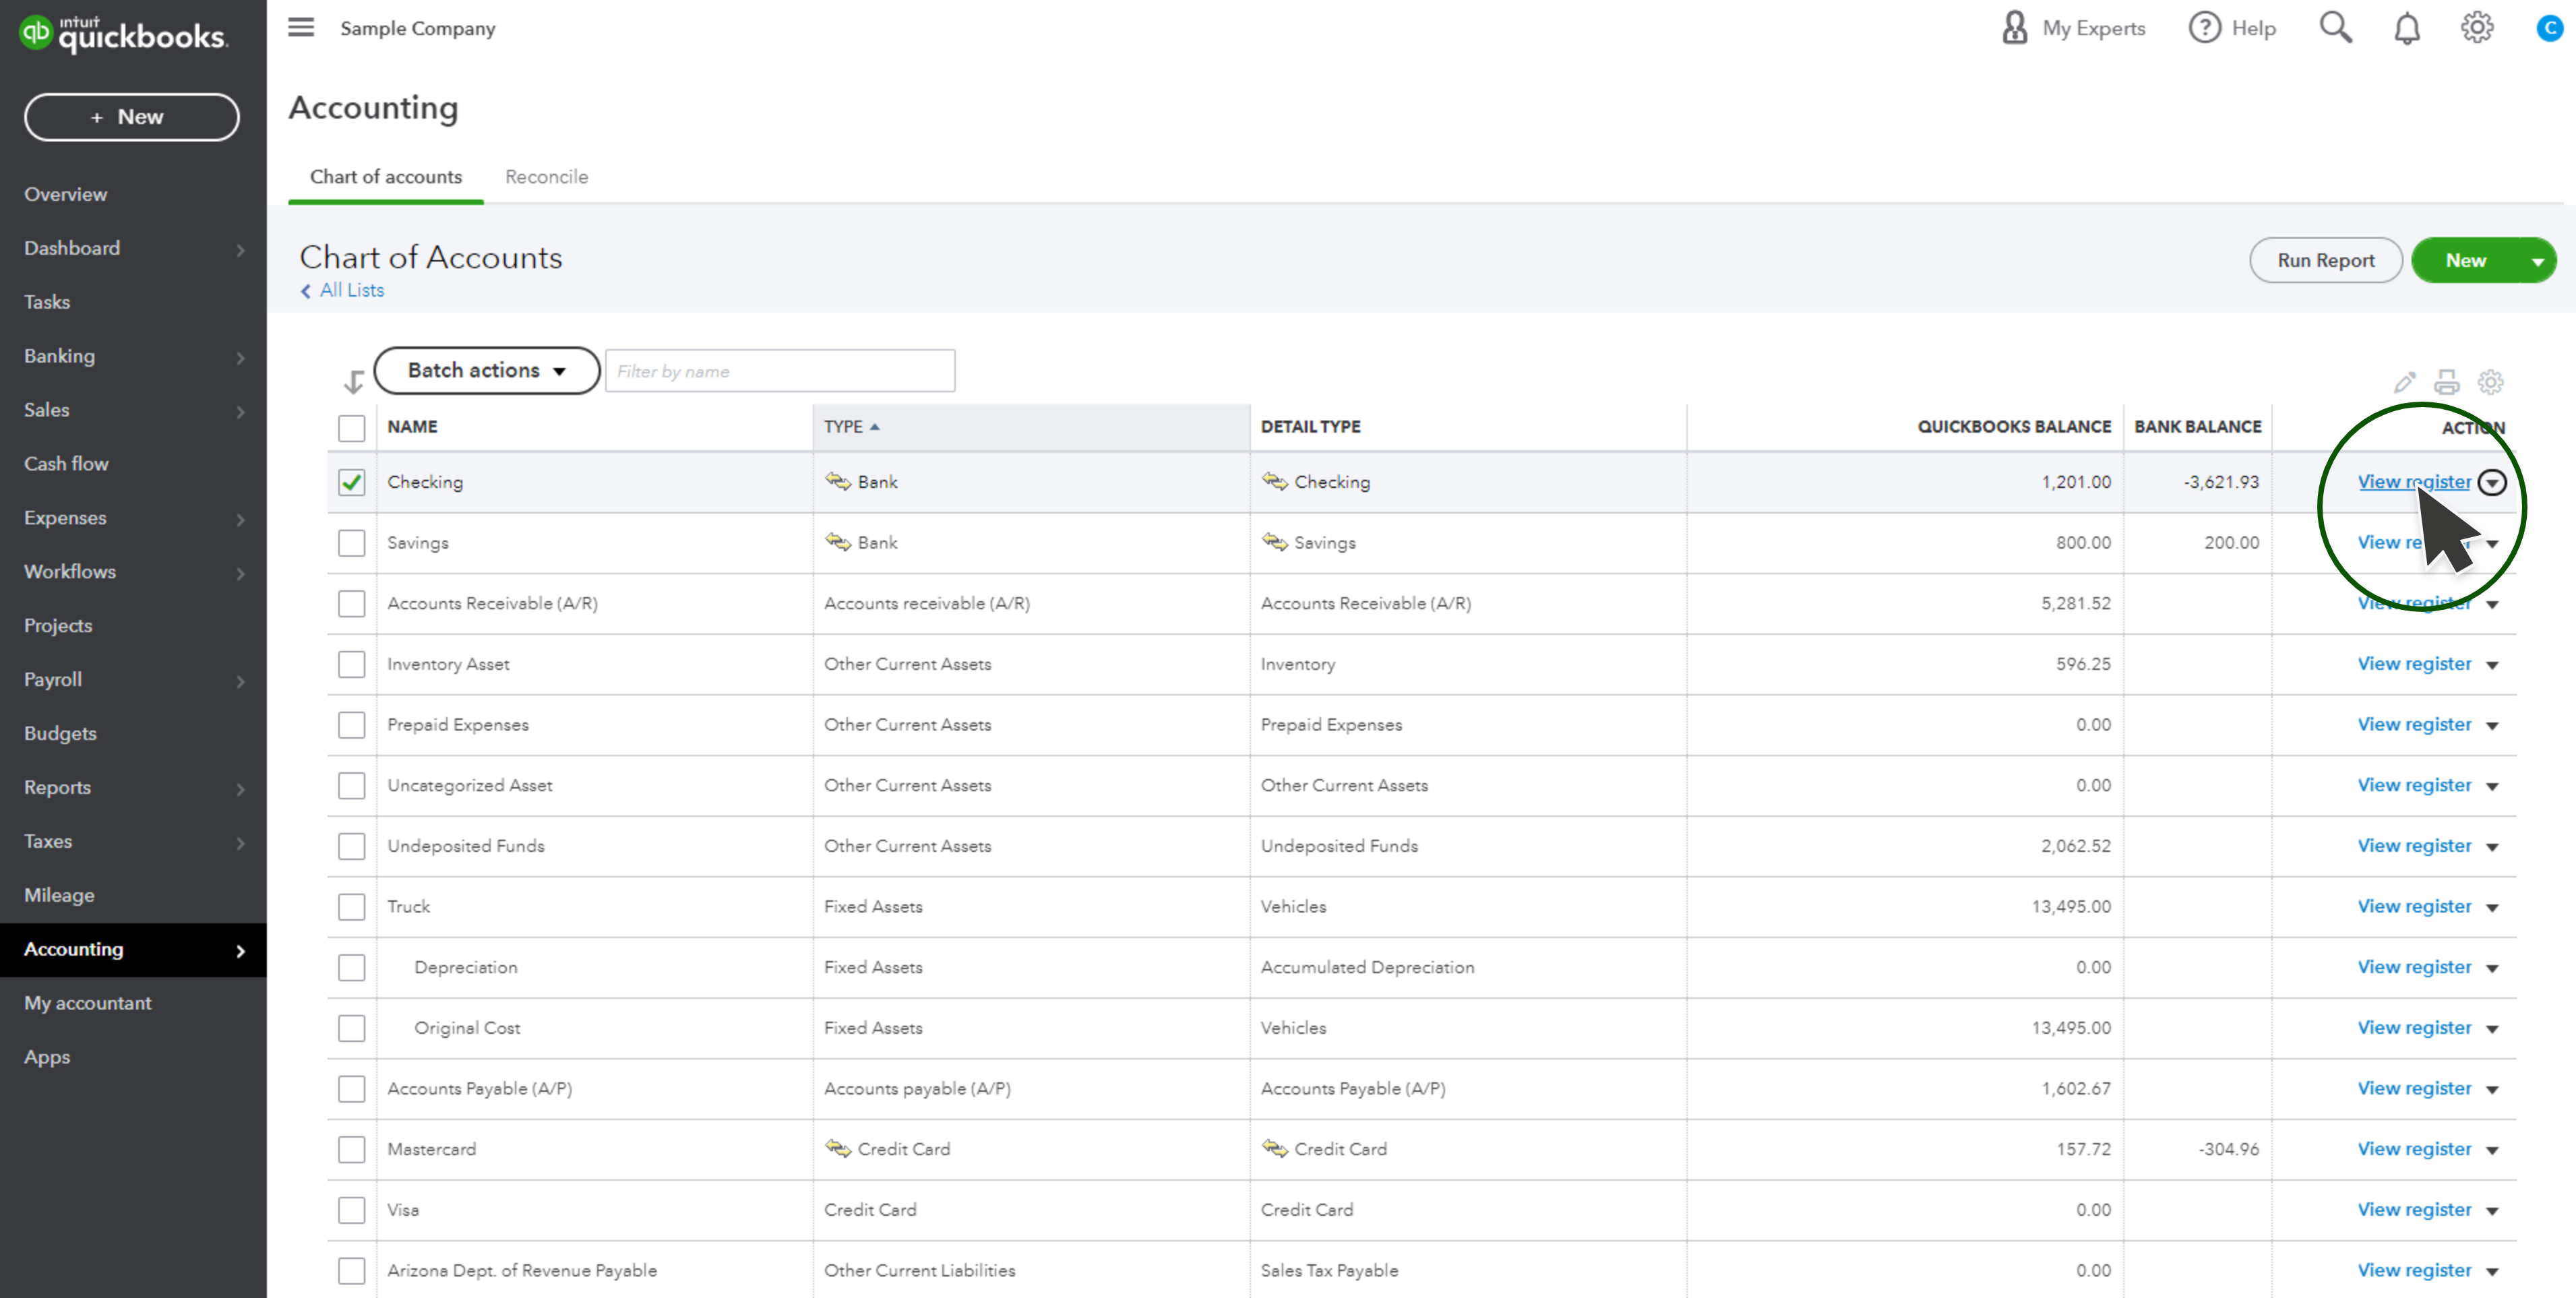
- Locate and select the check you want to void. This will highlight the check.
- Once the check is highlighted, you will select Edit, More, and finally, Void.

- You’ll be prompted to confirm that you want to void the selected check, click Yes to confirm.
To void a check from the Check page:
- Go to Bookkeeping, select Transactions, and then select Expenses
- Set the Filter type to Check
- Apply the date range in which the check was received
- Select the check to void from the Expense Transactions list to open it in the Check screen
- Click More, and select Void from the pop-up menu
- Finally, select Yes to confirm you want to void the check
You can also void a check from the Expense Transactions list:
- Go to Bookkeeping, select Transactions, and then select Expenses
- In the Expense Transactions list, locate the check to void
- From the Action column, select Void from the View/Edit ▼ drop-down menu
- Finally, select Yes to confirm you want to void the check
Once you’ve completed this process, your check should be successfully voided in QuickBooks.
You should also implement the necessary protocols and precautions to ensure the most accurate payment information is input into your accounting system.
Businesses can rest easy knowing they have reliable software and step-by-step directions to void checks in QuickBooks, which helps mitigate human error and fraudulent activity.
QuickBooks Online Integrations: Enhance Your Workflow
Did you find this tutorial helpful? Streamline your QuickBooks Online experience even further with a QuickBooks Online payment processing integration. Explore how integrating QuickBooks Online with tools like EBizCharge can enhance your workflow, automate processes, and boost productivity. Unlock the full potential of your QuickBooks environment today!